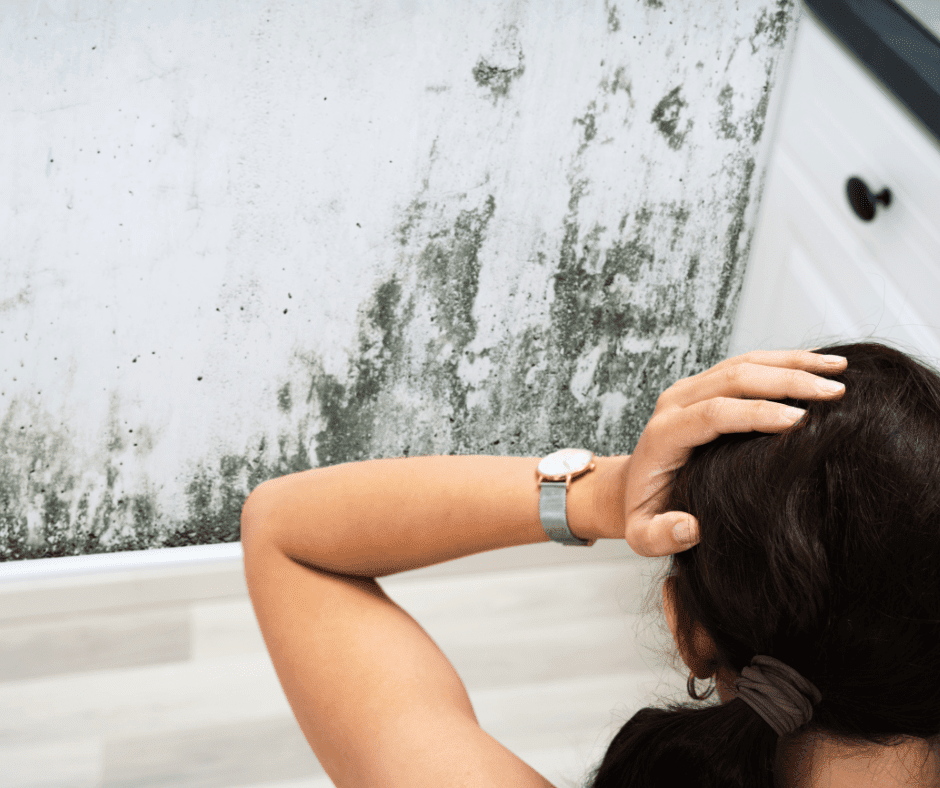
The Bathroom Battle You Keep Losing
You scrub it, bleach it, and wipe it clean — yet every few weeks, those black lines come crawling back around your bathtub or shower.
No matter what cleaner you use, the mold always wins.
If this sounds familiar, you’re not alone. Thousands of GTA homeowners face the same problem every winter and summer. The truth is, blackened caulking isn’t just about dirt — it’s about trapped moisture and poor sealing.
At RenoHeal, we’ve replaced hundreds of moldy silicone joints across Toronto homes. Here’s why it happens, why cleaning never truly fixes it, and how to stop it for good.
For dependable Handyman Services in Scarborough, take a look at our full range of local repair and home improvement solutions.
Watch: Why Your Shower Caulking Keeps Turning Black
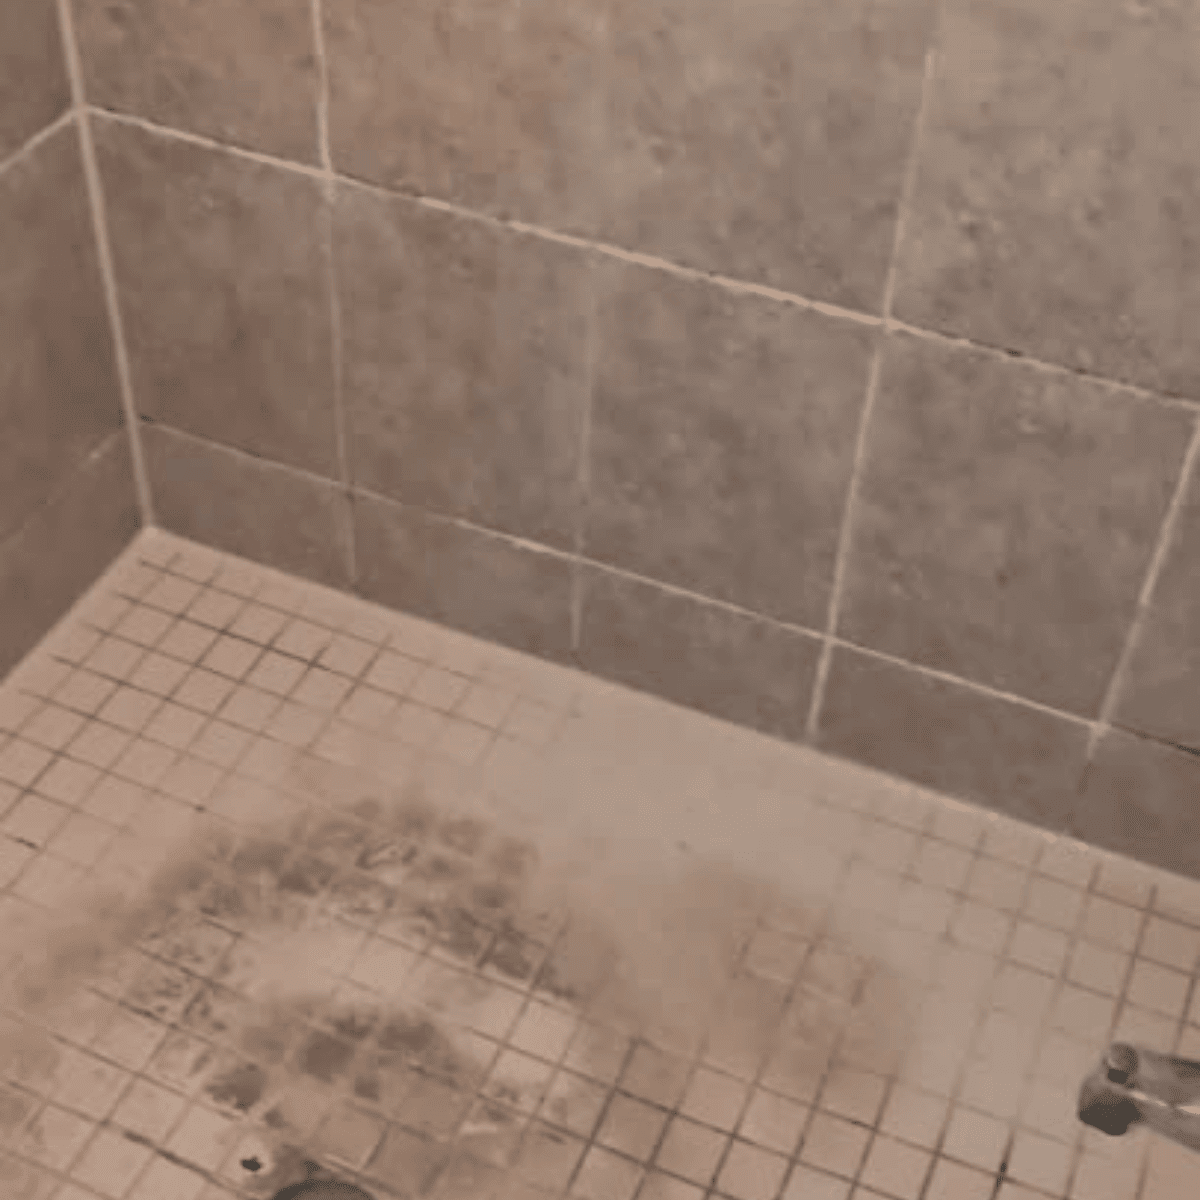
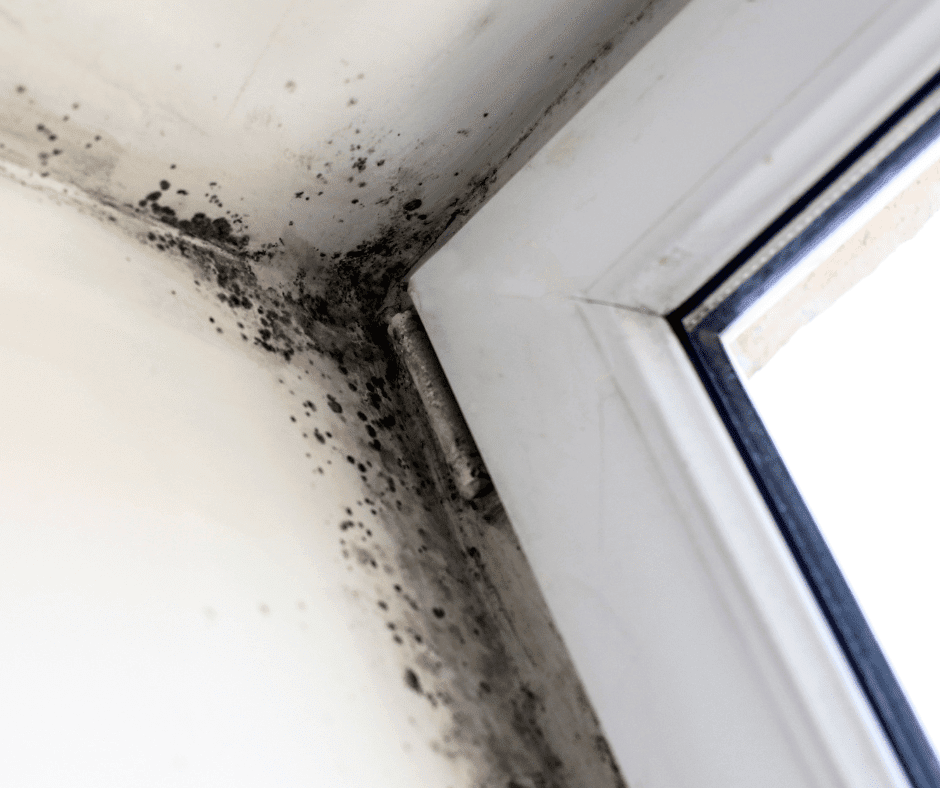
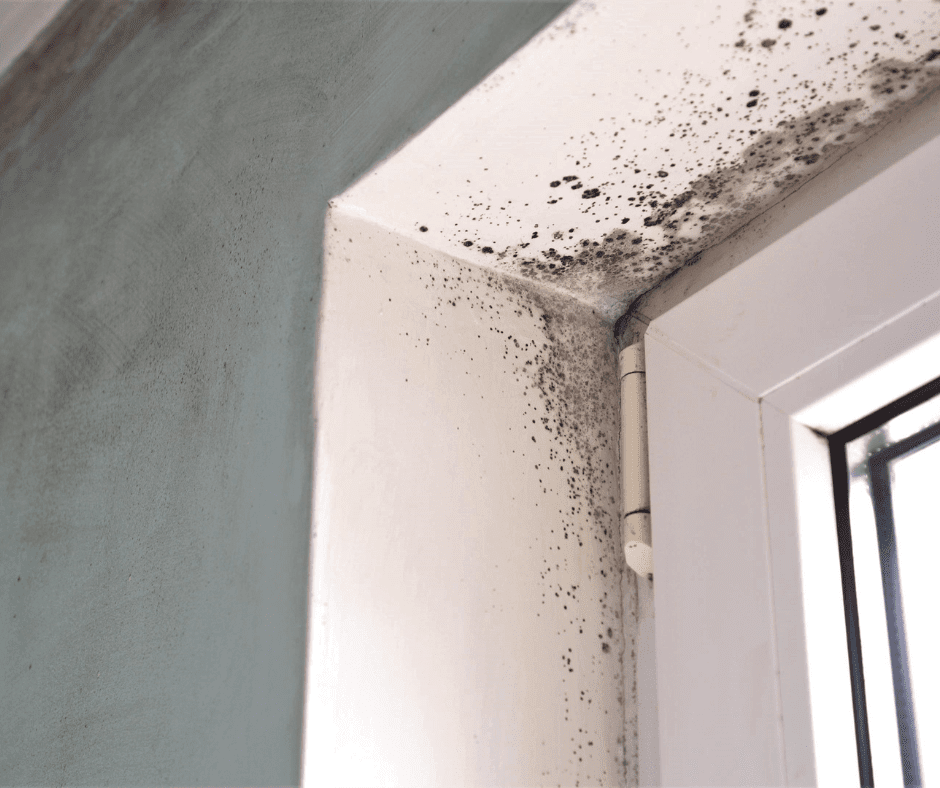
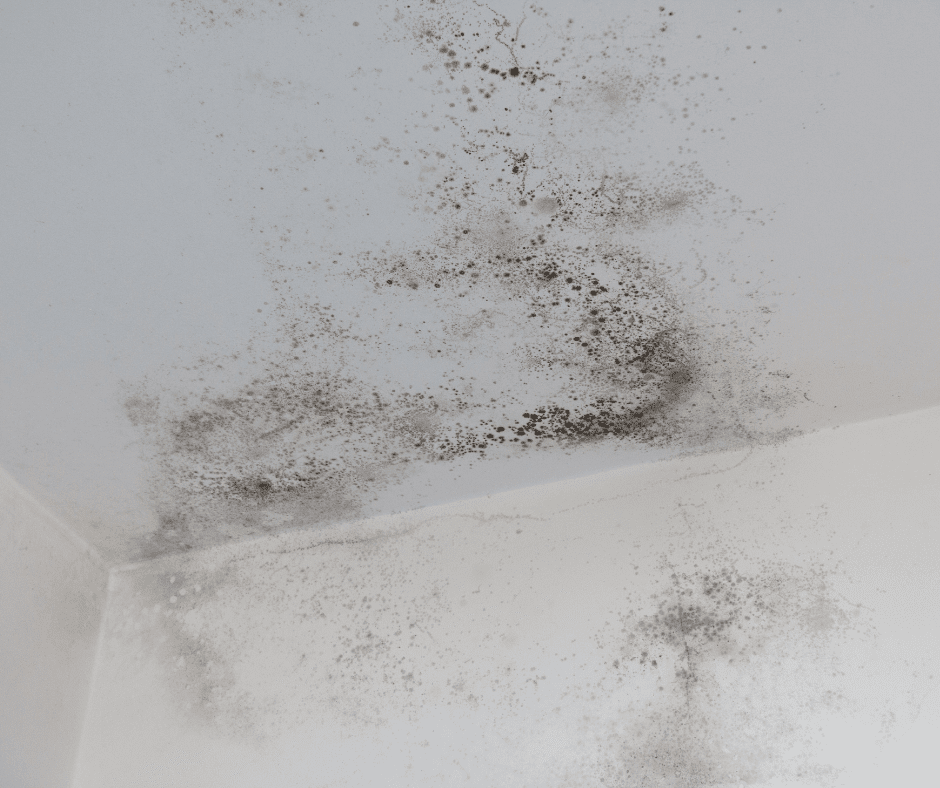
Failing grout and caulking often allow moisture to seep behind tiles and walls. Over time, trapped water leads to mold growth, black stains, and hidden damage inside your bathroom.
What Causes Caulking to Turn Black?
1. Moisture That Never Dries
Bathrooms are naturally humid, and water sits along the edges of tubs and tiles after every shower. If caulking isn’t properly sealed or sloped, that moisture stays trapped underneath — where light and air can’t reach.
Inside those damp layers, mold begins to grow, feeding on soap scum and tiny particles left behind from water.
For long-lasting moisture protection, our professional caulking service in Toronto seals showers, tubs, and bathroom joints to prevent mold from forming behind silicone.
2. Cheap or Old Silicone
Not all silicone is created equal. Many store-bought caulks claim to be “mold-resistant,” but they lack the professional-grade anti-fungal agents needed for long-term protection.
Over time, even a small gap allows water to sneak in behind the silicone, turning it soft, spongy, and black.
Professional contractors often rely on high-quality waterproof sealants available from stores like Home Depot to ensure durable and mold-resistant bathroom sealing.
3. Cleaning Products That Backfire
Ironically, the harsh chemicals people use to clean mold can actually make it worse. Bleach damages the outer layer of silicone, roughening it so new mold spores stick even easier the next time.
The Science of Shower Mold
Warmth + Moisture + Organic Material
Mold needs three things to survive — warmth, moisture, and something to eat. Your bathroom provides all three:
- Warm air from hot showers
- Moisture trapped in corners and seams
- Organic residue from soap, shampoo, and body oils
Once those elements combine behind failing caulking, mold can grow within 24–48 hours.
Why It Always Returns
Even if you scrub off surface mold, the spores beneath the silicone remain alive. As soon as humidity rises again, they reactivate.
That’s why mold “comes back” — it was never truly gone.
Why Cleaning Alone Doesn’t Work
Most homeowners try to fight black caulking with cleaning sprays, vinegar, or bleach. Unfortunately, these methods only remove surface stains.
If the mold has already penetrated through the silicone or behind it, cleaning simply can’t reach it.
Bleach Isn’t a Permanent Fix
Bleach whitens the mold temporarily but doesn’t kill spores underneath. Plus, it damages silicone, shortening its lifespan and making it even more porous for future growth.
Painting or Sealing Over Mold
Covering old caulk with a new layer is one of the worst mistakes — it traps moisture and spores inside, accelerating mold growth instead of stopping it.
The RenoHeal Way — How Professionals Stop It for Good
At RenoHeal, we don’t just “clean” moldy caulking — we replace it properly so it can’t come back. Here’s how our process keeps your shower clean and mold-free for years:
Step 1 – Full Removal of Old Caulking
We start by removing every trace of the old, moldy silicone using specialized tools that get deep into corners and edges. This step eliminates all the contaminated material that’s feeding the mold.
Step 2 – Disinfection and Surface Treatment
Next, we clean and disinfect the area with anti-fungal solutions to kill invisible spores hiding in grout and tile pores.
This step is what most DIY jobs skip — and it’s the main reason professional caulking lasts so much longer.
Step 3 – Precise Re-Caulking with Anti-Mold Silicone
We apply industrial-grade, waterproof silicone formulated for high-humidity Canadian bathrooms. It includes anti-fungal additives that prevent mold from growing inside the seal.
We also shape each line to ensure water flows away — no puddling, no trapping.
Step 4 – Perfect Curing and Clean Finish
Once the new caulking is applied, we let it cure properly to form a tight, flexible, long-lasting seal that can handle heat, steam, and daily cleaning.
How to Keep It Mold-Free Afterwards
Even professional caulking lasts longer when you maintain it the right way. Here are RenoHeal’s top homeowner tips:
1. Dry After Showers
Use a towel or squeegee to remove standing water from edges and corners. Less moisture means less chance for mold to start.
2. Keep Air Moving
Run the exhaust fan for at least 15 minutes after every shower. If you don’t have a fan, open the door to release humidity.
3. Use Gentle Cleaners
Avoid harsh bleach or acid-based sprays. Use mild soap or vinegar-based cleaners that protect silicone without eroding it.
4. Re-Inspect Every 12–18 Months
Check for cracks, peeling, or discoloration. Early maintenance is quick, inexpensive, and prevents larger issues later.
Why Professional Re-Caulking Is Worth It
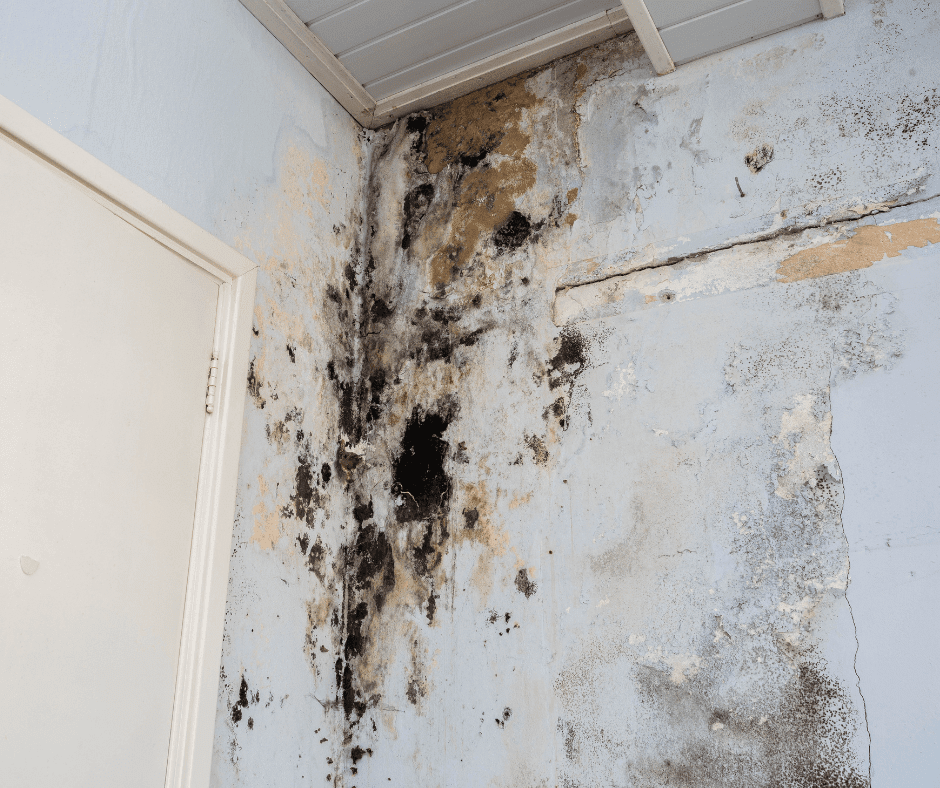
Replacing caulking isn’t just about appearance — it’s about preventing hidden water damage, mold, and costly repairs.
A professional re-caulking service from RenoHeal typically costs around $150, while repairing water-damaged drywall or tiles later can reach over $2,000.
If moisture damage has already affected your walls, professional drywall repair in Toronto can safely restore damaged sections and remove mold contamination.
By removing old silicone completely and sealing your shower correctly, you’re protecting your bathroom for years to come.
Keep Your Shower Fresh, Clean, and Mold-Free
If you’re tired of scrubbing the same black spots over and over, it’s time to fix the problem permanently.
At RenoHeal, we provide professional shower and bathtub caulking, mold removal, and waterproof sealing across Toronto and the GTA.
At RenoHeal, we take pride in delivering clean, durable, and professional home repairs that protect and improve your property.
Call 647-657-6367 or Request a Free Quote today.
Follow our renovation projects and tips on Instagram and YouTube.
RenoHeal proudly serves homeowners across the GTA including Toronto, North York, Vaughan, Richmond Hill, Markham, Aurora, Newmarket, Mississauga, and Brampton.