
If you live in Toronto or the GTA and your bathtub caulk looks dark, cracked, or smells off, it’s probably time for bathtub recaulking Toronto homeowners can’t ignore. Caulk doesn’t last forever—water, humidity, and temperature swings wear it down. When it fails, moisture sneaks behind it and causes real problems. Knowing when to strip it and start fresh saves you from bigger repairs down the road.
We recently completed a recaulking job in a Toronto condo (Unit 1005) where the inner bathtub sealant had deep mold growth. The caulk had deteriorated enough that simply re-caulking over it would’ve trapped moisture and made the problem worse. Complete removal was the only solution. That’s what we’ll walk you through here.
Signs Your Bathtub Caulk Has Gone Past Saving
Caulk that’s worth keeping is smooth, flexible, and watertight. If you see any of these signs, it’s time to remove it and recaulk:
- Visible mold or mildew: Black, green, or pink discoloration that doesn’t wipe away. If the mold is deep in the caulk (not just on the surface), it’s embedded and can’t be cleaned out.
- Cracks and splits: Small fissures let water in behind the caulk. In Toronto’s freeze-thaw cycles, this gets worse fast.
- Peeling or separation: Caulk pulling away from the tile or tub rim means it’s lost its bond.
- Gaps and shrinkage: Gaps wider than a hair-thin line indicate the sealant has failed.
- Soft or spongy texture: Press it gently with your finger. If it feels mushy, water has compromised it.
- Discoloration: Yellowing, browning, or dark staining points to age, mold, or water damage inside.
In the Unit 1005 Toronto job, the caulk was dark and soft when we inspected it. That’s a red flag that moisture has been pooling there—likely for months. Once you spot those signs, stripping and recaulking is faster and cheaper than dealing with tile damage or drywall rot later.
Why Caulking Over Old Caulk Is a Mistake
It’s tempting to save time and just caulk over the old sealant. Don’t. Here’s why:
It traps moisture. New caulk adheres to the old caulk, not to the tile or tub. Water seeps between the two layers, where it sits and breeds mold. You end up with a moisture sandwich that accelerates decay. Within months, the new caulk will look as bad as the old one.
The bond fails faster. Caulk needs to stick to a clean, solid surface. Layering caulk on caulk creates a weak point. The old caulk is already compromised—it can’t hold the new sealant. Peeling and separation happen quickly, especially around the inner bathtub edge where water pressure and movement are highest.
Mold spreads underneath. If mold is already present (like in the Toronto condo we worked on), covering it with new caulk seals the problem inside. Mold grows in the dark, moist environment you’ve just created. It spreads to the substrate, tile grout, or even drywall behind the tub. By the time you see a problem again, the damage is much bigger.
Proper bathtub caulking starts with complete removal of the old sealant, cleaning the joint, and letting it dry. It takes longer but it lasts 5–10 years instead of 6 months.
How Bathtub Recaulking Toronto Pros Get It Done Right
Proper recaulking isn’t just about squeezing new sealant over old stuff—that’s a shortcut that costs you later. The right approach means stripping everything out first, treating any mold, and prepping the surface so the new caulk actually bonds and lasts.
Step 1: Complete Removal of Old Sealant
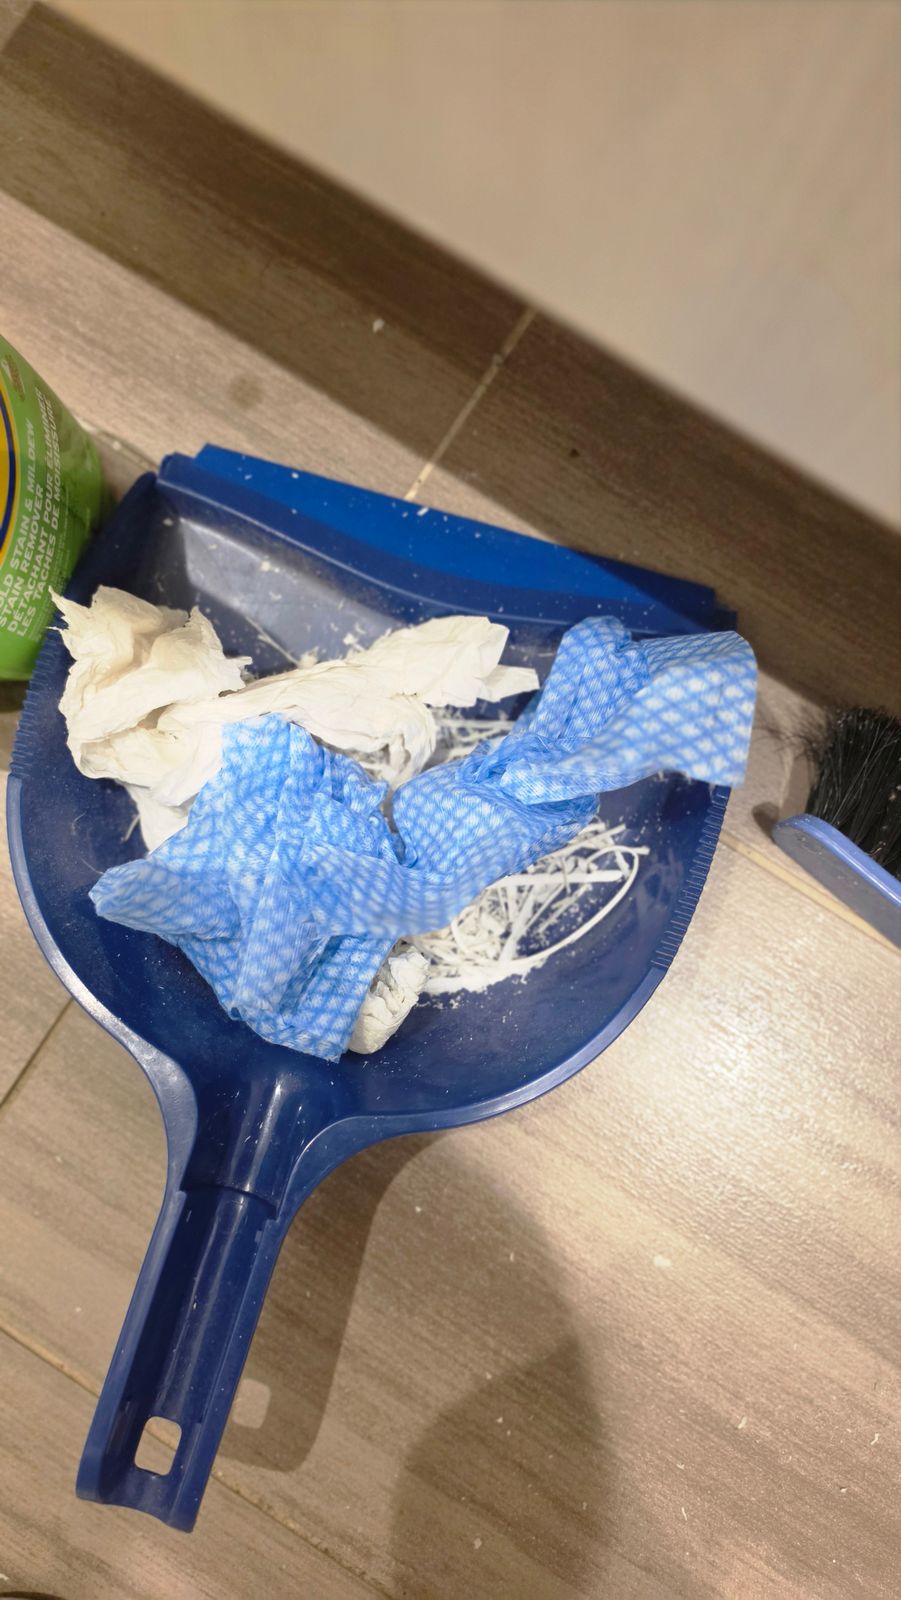
This is non-negotiable. Whether you’re in Toronto, Mississauga, or Scarborough, old caulk that’s failed has usually absorbed water, mold spores, and soap residue. You need to remove it entirely—typically with a caulk removal tool, utility knife, or specialized caulk softener. Leaving any behind creates an unstable base that new caulk won’t grip, and trapped moisture underneath breeds mold faster.
Step 2: Mold Assessment and Treatment
If mold is present (dark staining, odor), it has to be addressed before caulking. A diluted bleach or antifungal spray kills active spores. Let it sit and dry completely—at least 24 hours in Toronto’s typical humidity. If mold goes deep into grout or tile, it may need professional mold removal first.
Step 3: Surface Drying and Prep
Even after cleaning, moisture can hide in cracks and pores. Run a heat gun or hair dryer along the joint, or let it air dry for a full day. Wipe down with a lint-free cloth. A dry surface is the only surface where caulk will cure properly and resist mold regrowth.
Step 4: Proper Caulk Application
Use a caulk gun at a 45-degree angle, laying a consistent bead in one smooth motion. Don’t overfill; a quarter-inch joint is standard. Smooth it with a wet finger or tool to help it bond into corners. Let it cure fully (usually 24–48 hours) before water exposure. Proper application prevents gaps, air pockets, and premature failure.
A professional bathtub caulking service in Toronto handles all these steps—including mold treatment—to ensure the job lasts years, not months.
What Type of Caulk Should Be Used Around a Bathtub
100% Silicone vs. Latex Caulk
100% silicone is the standard for bathrooms. It’s waterproof, flexible, and resists mold far better than latex or acrylic blends. Latex caulk absorbs water over time, shrinks as it dries, and creates gaps where mold thrives. In a high-moisture environment like a Toronto bathroom—especially through humid summers and condensation in winter—silicone is the only smart choice.
For most tubs we use a 100% silicone sealant labelled for kitchens and baths with a mould inhibitor. Health Canada’s guidance on mould in the home is a good reminder of why a bathtub recaulking Toronto job should never be skipped once black spots appear.
Latex might seem cheaper upfront, but it fails faster and forces you to recaulk every 1–2 years. Silicone costs a bit more but lasts 5–7 years or longer when applied correctly.
Mold-Resistant Formulas for Toronto Humidity
Look for silicone caulk labeled as mold-resistant or mildew-resistant. These contain fungicides that suppress mold growth—critical in Toronto’s humid climate and in bathrooms where moisture never fully dries. Brands like DAP, GE Silicones, and Sherwin-Williams offer specialized bathroom caulks with these features.
Avoid cheap, generic silicone. It’s tempting, but it often lacks the additives needed to resist mold, especially in North York, Etobicoke, and other GTA areas with high indoor humidity. Invest in quality, and you’ll avoid another recaulking job in six months.
Bathtub Recaulking Toronto Cost Guide (2026)
Bathtub recaulking in Toronto typically ranges from $150 to $400 for labour, depending on the scope of work and your location in the GTA. If old caulk needs full removal (which is often the case when mold is present), expect the higher end of that range. Material costs add another $20 to $60 depending on the caulk quality and linear footage of joints you’re sealing.
| Service | Labour Cost (CAD) | Material Cost (CAD) | Timeline |
|---|---|---|---|
| Basic recaulking (no removal) | $150–$200 | $20–$40 | 2–3 hours |
| Strip and recaulk (mold present) | $250–$400 | $30–$60 | 4–6 hours |
| Tile surround + tub recaulking | $300–$500 | $40–$80 | 5–8 hours |
Condo vs. House Considerations
Condo units in Toronto—like the one we recently completed in Unit 1005—often cost slightly less because bathrooms are smaller and more standardized. Single-family homes in Scarborough, Etobicoke, or Markham may have larger, custom-tiled tubs that require more time and precision, pushing costs toward $400+. Also factor in parking, building access, and whether you need to schedule work during specific condo hours.
Factors That Increase Your Cost
- Mold removal: If caulk harbours mold (as in our recent Toronto project), full removal and disposal takes extra time.
- Poor substrate: Damaged tiles or grout around the tub require prep work or minor repairs before recaulking.
- Caulk quality: Premium, mould-resistant silicone costs more than basic acrylic but lasts longer in Toronto’s humid bathrooms.
- Complex corners: Corner jets, alcoves, or curved tubs add labour.
- Multiple tubs: If your home has a master bath and ensuite, the second tub costs less (usually 30–50% off) because setup is already done.
In Mississauga, Brampton, or North York, pricing is consistent with Toronto, though some contractors may charge slightly less outside the core city. Always get a free estimate to know your exact cost—reputable contractors will inspect the mold level and joint condition first.
DIY vs Hiring a Professional for Bathtub Recaulking
Recaulking a bathtub sounds simple—remove old caulk, apply new sealant, smooth it out. In reality, most DIY attempts fail because homeowners underestimate prep work, use the wrong tools, or apply caulk in humid conditions that prevent proper curing. The result is gaps, mold returning within months, or a messy finish that looks unprofessional.
Bathtub recaulking is often paired with a shower or backsplash reseal. Our bathroom services page covers the full list, and we work across Toronto, North York and Etobicoke.
Common DIY Failures
- Incomplete caulk removal: Leaving behind old, mouldy sealant defeats the purpose. Removing it properly requires a caulk gun, a scraper, and patience—often 1–2 hours just for prep.
- Wrong caulk type: Many DIYers buy paintable acrylic caulk instead of 100% silicone. Acrylic fails faster in wet bathrooms and doesn’t resist mold as well.
- Poor moisture control: Caulk needs 24–48 hours to cure without water exposure. In a busy family home, that’s hard to guarantee.
- Uneven bead: Even professionals use caulk guns with steady hands. A wavy or too-thick line looks cheap and can trap water underneath.
- Dust and debris: If the joint isn’t clean and dry, caulk won’t bond, and it separates within weeks.
When Hiring a Professional Pays Off
If your bathtub caulk shows mold—like the Unit 1005 project in Toronto—you need someone who can identify root causes (poor ventilation, caulk failure, substrate damage) and address them properly. A professional applies mould-resistant silicone, ensures proper joint depth, and delivers a long-lasting seal. You also get a warranty on eligible services, full insurance coverage, and peace of mind that it’s done right.
Professional caulking services across Toronto, Thornhill, Richmond Hill, and surrounding areas typically complete the job in one day. You can use the bathroom again by the next morning, and the caulk is guaranteed not to separate or mould for years. Given that DIY costs are only $40–$80 in materials but consume your weekend and risk failure, hiring a pro makes financial sense—especially if you value your time and want a finished bathroom that stays dry and clean.
Maintenance Tips to Make Your New Caulk Last Longer
After your bathtub recaulking is complete, proper maintenance is what keeps the sealant intact and mold-free. The first rule is patience: don’t use the tub for at least 24 to 48 hours after application. This allows the caulk to cure fully and bond properly to the tile and tub surface.
Ventilation is your strongest defense against mold. Run your exhaust fan during and for 30 minutes after every bath or shower. If your bathroom lacks proper ventilation, consider calling a handyman to upgrade it—moisture trapped behind walls is expensive to fix later.
Weekly and Monthly Cleaning
- Wipe down the caulked seams with a dry cloth after each shower to reduce standing water.
- Weekly, clean with a mild bathroom cleaner or 1:1 water and white vinegar solution.
- Avoid harsh scrubbing or abrasive pads on fresh caulk—they damage the sealant surface.
- Never use bleach directly on silicone caulk; it breaks down the material.
Inspection Schedule
Check your caulk lines every three months. Look for small gaps, discoloration, or soft spots that signal early failure. Catching these early means a small touch-up instead of full removal. In Toronto’s humid climate, annual professional inspection is worth the cost.
Frequently Asked Questions
How long does bathtub recaulking take?
A professional can strip old caulk, clean and prep the surface, and apply fresh caulk in roughly 1 to 2 hours for a standard bathtub. The work itself is quick — the limiting factor is cure time before the tub can get wet again. DIY jobs tend to take longer, especially if old caulk removal is slow or surface prep is done in stages.
How soon can I use my bathtub after recaulking?
Most silicone caulks are touch-dry within a few hours but need a full 24 hours before exposure to water. Some products — particularly 100% silicone in humid bathroom conditions — benefit from a full 48-hour cure before the tub is used. Check the manufacturer’s spec on the product used, and when in doubt, wait the full two days.
Why does my bathtub caulk keep going moldy?
Mold grows in caulk when moisture is trapped — either because the caulk has small cracks or gaps, or because ventilation in the bathroom is poor and surfaces stay damp. Low-quality acrylic caulk without mildewcide additives also breaks down faster and harbours mould more readily than 100% silicone. Switching to a silicone-based product and running your exhaust fan during and after every shower makes a significant difference.
Can I recaulk my bathtub myself or should I hire someone?
You can DIY bathtub recaulking, but the results depend almost entirely on how well the old caulk is removed and how clean the surface is before you apply the new bead. Many homeowners skip surface prep, apply new caulk over old residue, and end up with peeling or mouldy caulk within months. Hiring a professional is worth it if you want a clean, even finish that lasts — especially around fibreglass tubs where improper tools can cause scratching.
How much does bathtub recaulking cost in Toronto?
Bathtub recaulking in Toronto typically runs between $150 and $350 CAD for a professional service, depending on the size of the tub surround, the condition of the existing caulk, and whether any mould remediation is needed before resealing. Basic strip-and-recaulk jobs on a standard tub fall toward the lower end of that range. Getting a free estimate before booking ensures you know exactly what’s included.
How often should bathtub caulk be replaced?
With a quality silicone product and good bathroom ventilation, bathtub caulk should last 5 to 10 years before it needs replacing. In high-use bathrooms or homes with poor exhaust ventilation, 3 to 5 years is more realistic. If you notice cracking, peeling, discolouration, or visible gaps before that window, don’t wait — water getting behind the caulk line causes tile and substrate damage that costs far more to fix than a recaulk job.
Bathtub Recaulking in Toronto: Don’t Wait Until Water Gets Behind the Wall
Cracked, mouldy, or peeling caulk around your bathtub isn’t just an eyesore — it’s an open door for water to reach your tile substrate, drywall, and framing. Catching it early and doing a proper strip-and-recaulk is one of the least expensive ways to protect your bathroom from serious moisture damage.
The difference between a recaulk job that lasts 2 years and one that lasts 8 comes down to prep work and material choice. Full removal of old caulk, thorough surface cleaning, and the right silicone product applied in the right conditions — that’s what separates a lasting seal from a temporary fix.
RenoHeal’s technicians handle bathtub recaulking across Toronto and the GTA with full insurance, WSIB coverage, and a workmanship warranty on eligible services. Request a free quote today, or learn more about our full range of professional caulking services in Toronto.