
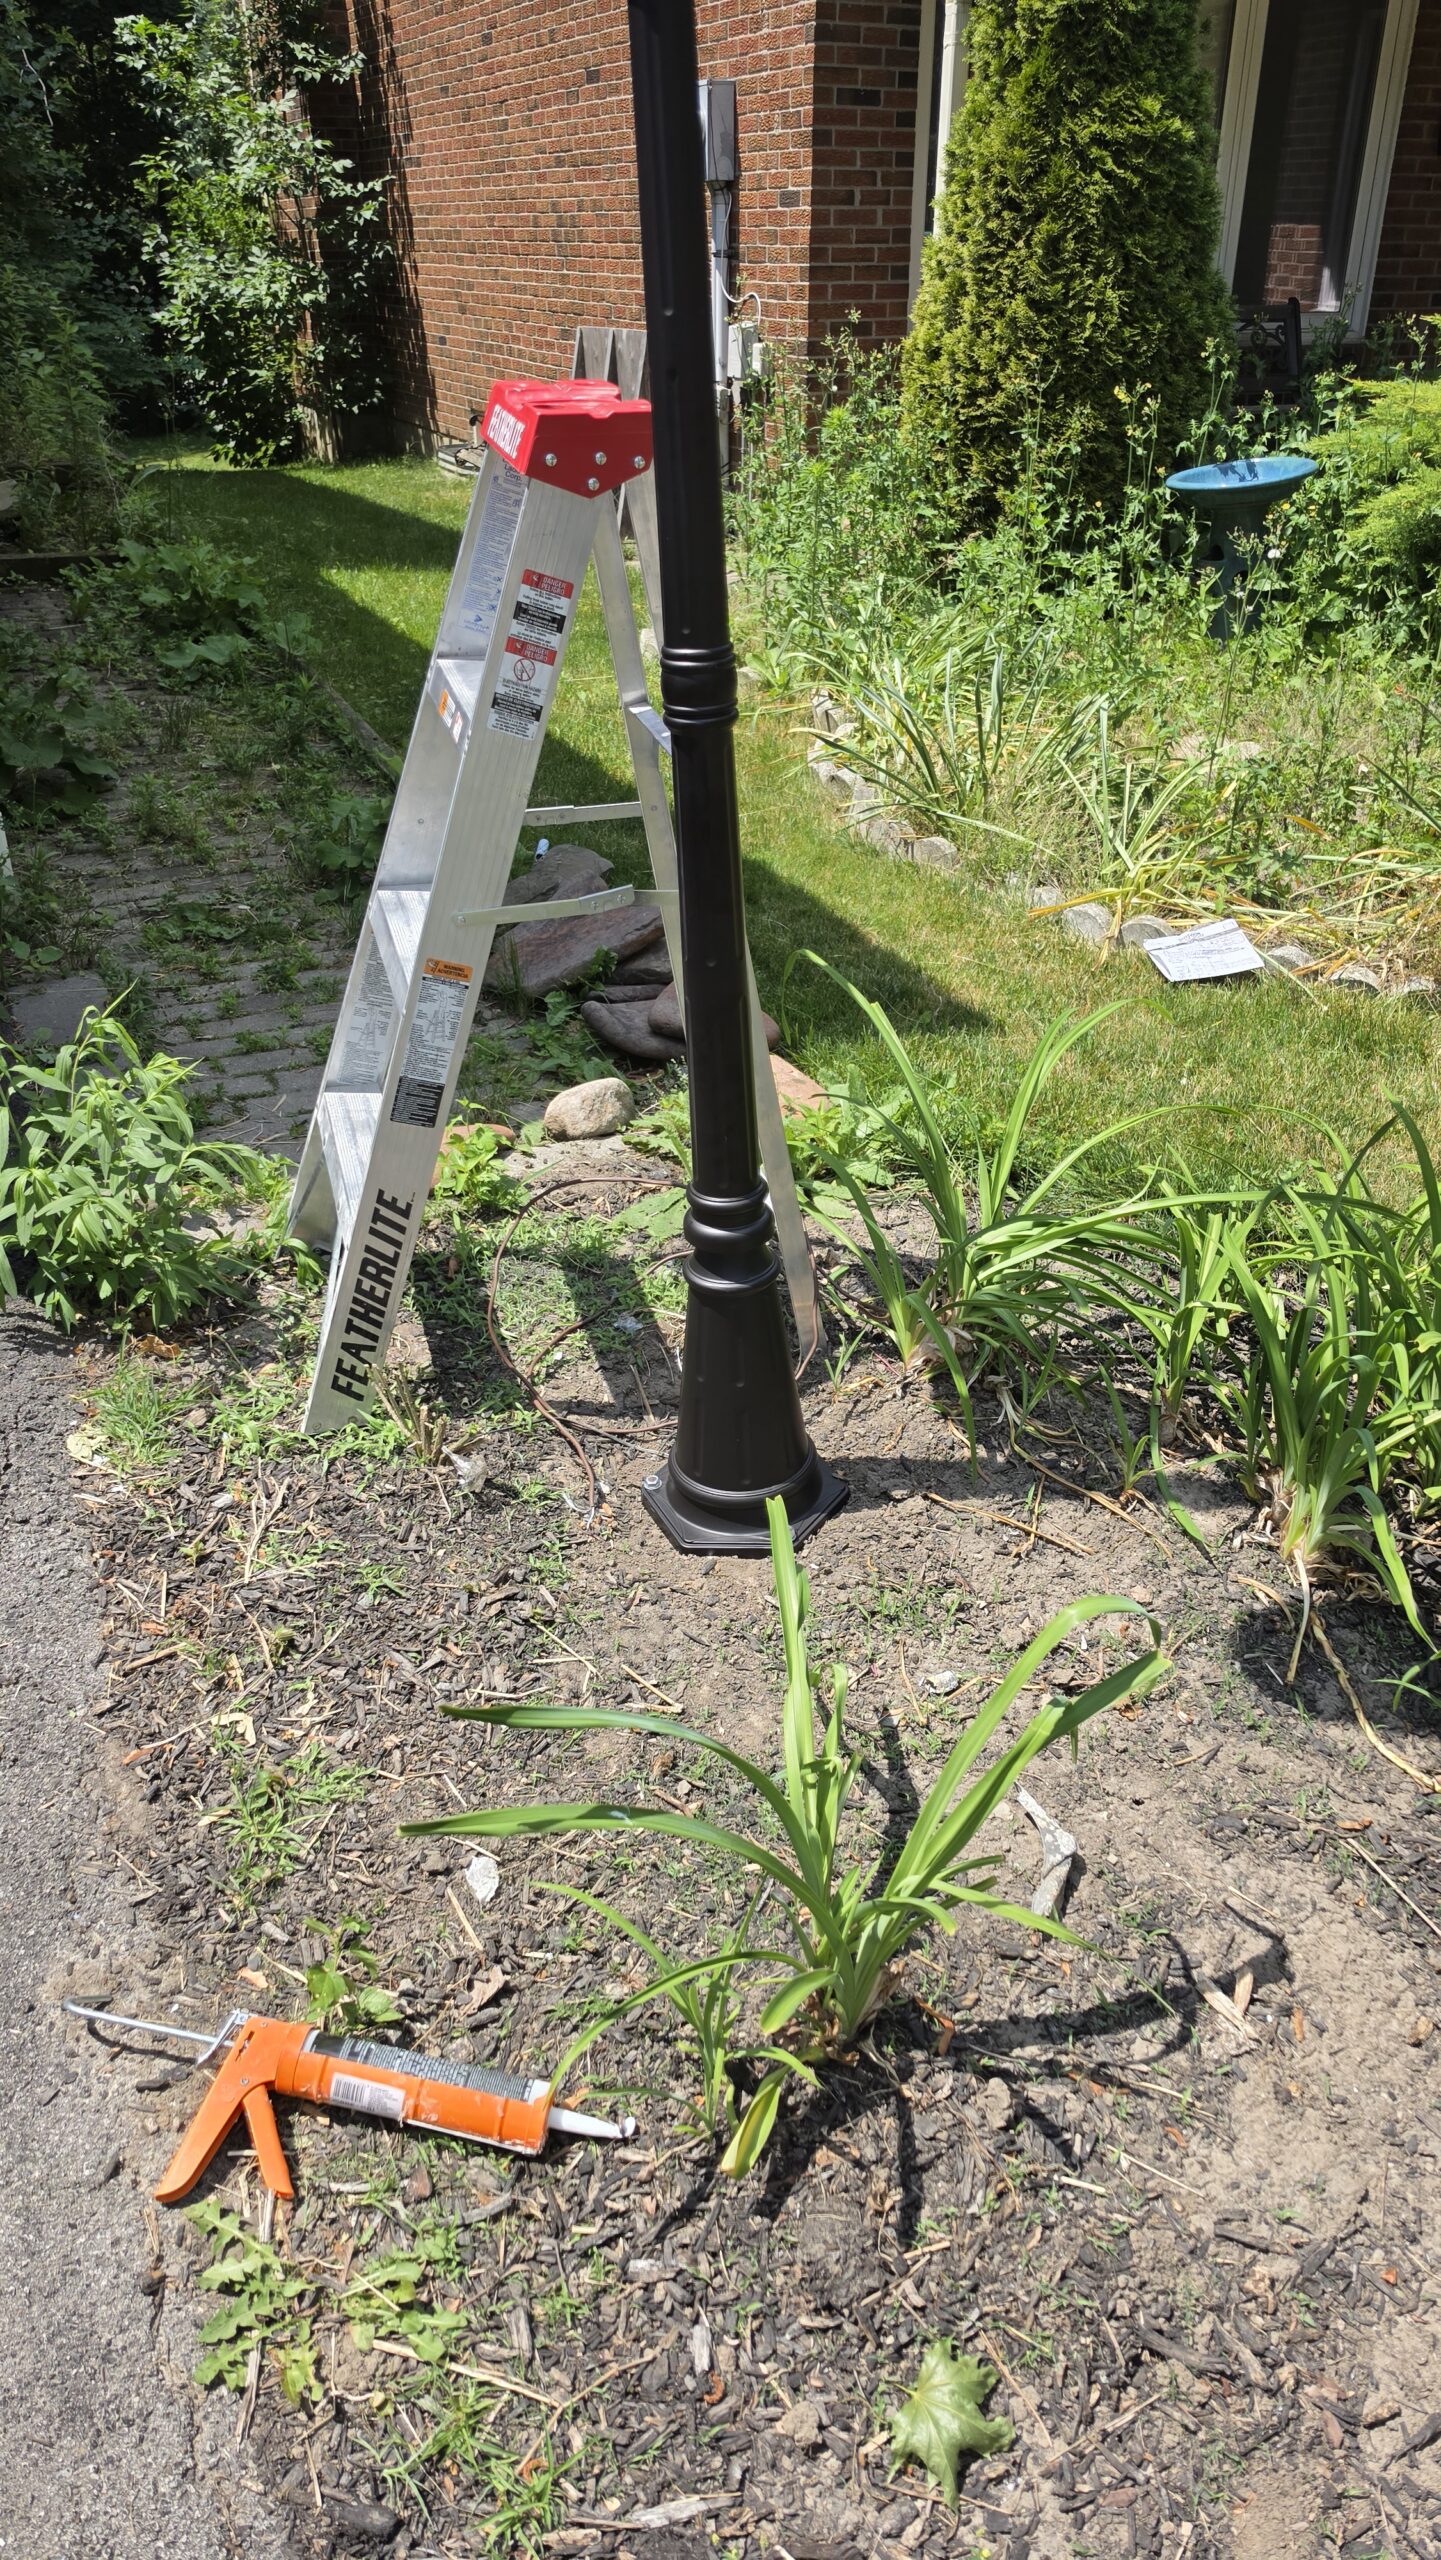
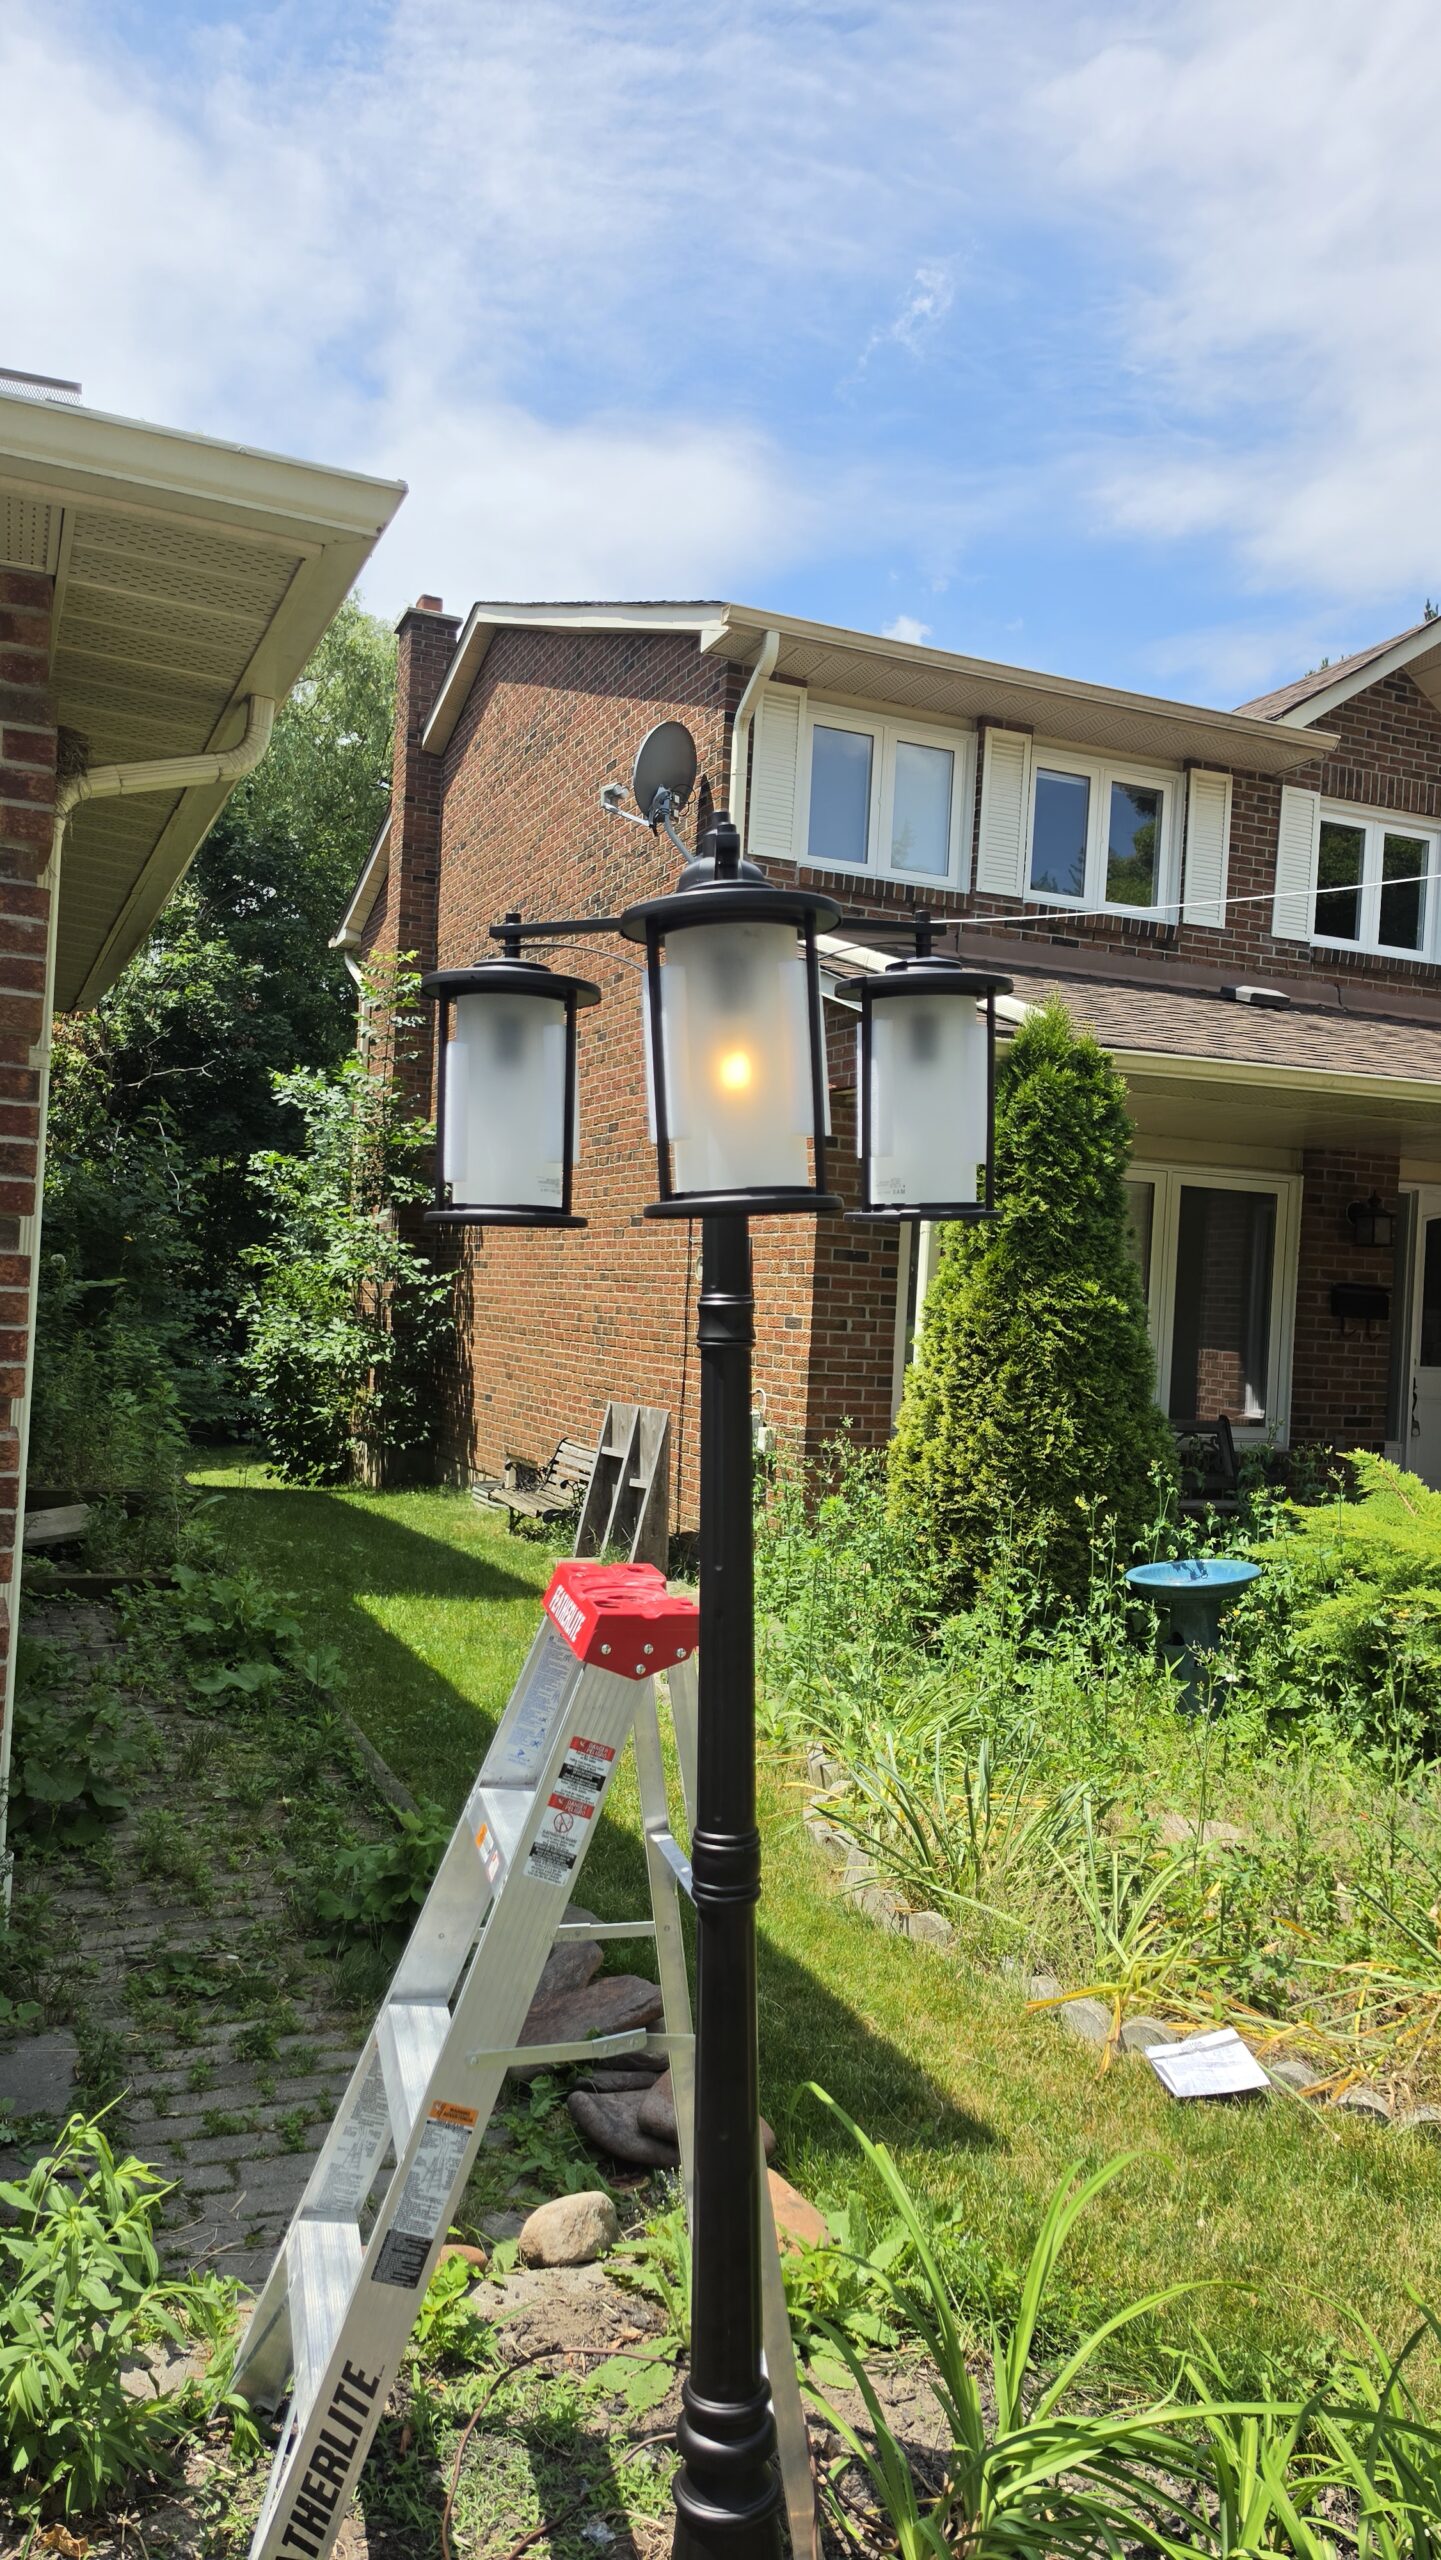
Outdoor lamp post installation Toronto isn’t just about screwing a fixture onto a pole and calling it done. Whether you’re replacing a post that’s weathered out after years in the GTA’s freeze-thaw cycles or upgrading to modern LED lighting, the job involves base assessment, structural assembly, and proper electrical connection—and getting it wrong can mean safety issues or a post that won’t survive the next winter. We recently completed a lamp post installation in Toronto where the existing concrete base was still solid; we removed the old bolts, assembled the new post, secured it, and ran the electrical connection. That project showed us what separates a quick fix from a installation that lasts.
The difference between a DIY attempt and professional work often comes down to how carefully the base is evaluated and how the wiring is protected from moisture—two things that directly affect how long your post stays upright and functional in Toronto’s weather.
What Outdoor Lamp Post Installation in Toronto Actually Involves
Lamp post installation breaks down into distinct stages: base inspection and preparation, post assembly, securing the post to the foundation, and electrical wiring. The scope depends on whether you’re working with an existing concrete base or installing one from scratch.
If a reusable base exists (which we find is often the case in Toronto properties), the first step is bolt removal—old anchor bolts can be corroded or stuck tight, especially after several Ontario winters. These need to come out cleanly so the new post sits flush and level. Once bolts are out, the base surface gets checked for cracks, settling, or heaving. If the base is solid, you’re ahead; if not, replacement becomes necessary.
Post assembly happens next. Modern lamp posts ship in sections—the main pole, top cap, bracket (if it’s a side-arm style), and fixture housing. These pieces are fitted together, checked for plumb with a level, and then bolted securely to the base using new anchor bolts and concrete anchors rated for outdoor use. Misalignment here is visible forever, so precision matters.
Electrical work is the final piece. Conduit runs from the base (often from an existing circuit or new junction box) up through the post to the fixture. The wiring gets protected from water ingress with proper sealing at entry points—this is what prevents corrosion and short circuits during wet months. Our installations include testing the circuit before you flip the switch.
Can You Reuse Your Existing Base? What Pros Check First
The existing base is your cost-saver or your headache. A sound concrete foundation means labour drops significantly; a cracked or failing base means removal, new concrete work, and added expense. We assess this before quoting any lamp post installation in North York, Etobicoke, Toronto, or anywhere else in the GTA.
What we actually inspect:
- Concrete integrity: Surface cracks (hairline is normal; deep cracks or spalling mean trouble), and evidence of settling or frost heave. Ontario’s ground freezes and thaws hard, so we look for vertical shift or tilting in the existing base.
- Anchor bolt condition: Bolt removal is the first real test. If bolts spin out easily with moderate wrench pressure, that’s good. If they’re seized, stripped, or corroded through, it signals moisture damage inside the concrete itself.
- Drainage: Does water pool around the base? Poor drainage accelerates frost damage and concrete breakdown.
- Level and plumb: We check whether the base surface is actually level. A tilted base means the new post will lean, and no amount of shimming fixes the underlying problem.
If the base passes these checks, it stays. If it fails, it comes out. We’ve found that bases older than 15–20 years in Toronto are 50/50 on reusability; newer concrete (especially post-2010) tends to hold up if it was poured with proper slope and drainage. On the project we recently completed, the existing base was sound—old bolts came free without drama, no cracking, good drainage—so we proceeded with assembly and wiring on the same day.
Reusing a solid base is why some lamp post installations cost less than others. If your base needs replacement, we’ll be straightforward about that during a free estimate. Our team has 7+ years installing outdoor fixtures across the GTA, and we’ve dealt with enough concrete failures to know what works and what doesn’t.
Wiring Options: Low-Voltage, Line-Voltage & Conduit Runs
How you wire your lamp post matters for safety, permits, and long-term reliability. Ontario’s Electrical Safety Code governs all outdoor electrical work, and choosing the right method saves headaches during inspection.
Low-Voltage LED Systems (12V or 24V)
Low-voltage lamp posts use a transformer to step down standard 120V household current to 12V or 24V. They’re the safest option for DIY-adjacent installs and don’t always require a licensed electrician in Ontario—but verify with your local authority having jurisdiction (AHJ) first. Installation is straightforward: bury low-voltage cable in a shallow trench (no conduit required below 24V in most cases), connect to the transformer, and wire to your lamp fixture. Runtime costs are lower because LED bulbs consume minimal power.
The trade-off: lower brightness than line-voltage systems, and the transformer adds $150–$300 to material costs.
Line-Voltage (120V Direct) Installation
Direct 120V wiring delivers brighter light and runs any standard outdoor fixture. This method requires a licensed electrician in Ontario and a municipal electrical permit. The lamp post must be buried in rigid conduit from the panel to the post base—typically 24 inches deep in Toronto and the GTA to prevent frost heave damage. Conduit protects the wire from damage and meets code.
Line-voltage is more expensive upfront but eliminates transformer costs and works with any standard outdoor light fixture. Many homeowners in North York and Scarborough choose this for driveway or decorative posts because the brightness is non-negotiable.
Conduit Runs & Trenching
Whether low-voltage or line-voltage, burying conduit correctly is critical. In Ontario’s freeze-thaw climate, buried conduit must slope slightly away from the post base and sit below frost depth. Improper installation leads to heaving, water intrusion, and corroded connections. A professional will also identify underground obstacles—gas lines, water mains, telecommunications—by calling Ontario One Call (call 811) before digging.
Conduit costs run $1–$3 per foot depending on diameter and material (PVC vs. rigid steel). Labour to trench and install adds another $5–$12 per linear foot in Toronto and surrounding areas like Mississauga and Etobicoke.
Permit Requirements
Any outdoor electrical work in Ontario—low-voltage or line-voltage—may require a municipal electrical permit and inspection. Toronto and most GTA municipalities require one if you’re adding a new circuit or running conduit. Permits cost $50–$200 and protect you: the inspector ensures code compliance and your safety. Always contact a licensed electrician or RenoHeal to confirm your specific jurisdiction’s rules before starting.
Outdoor Lamp Post Installation Cost in Toronto: 2025 Price Guide
Labour, materials, and whether you’re reusing an existing base all affect the final cost. Here’s what homeowners in Toronto, Vaughan, and Richmond Hill are paying in 2025.
| Installation Type | Labour Cost (CAD) | Material Cost Range (CAD) | Total Estimate (CAD) | Timeline |
|---|---|---|---|---|
| Labour Only (Reusable Base) | $300–$500 | Fixture only: $150–$600 | $450–$1,100 | 2–3 hours |
| Low-Voltage LED Install (New Base) | $400–$700 | Post, transformer, fixture: $400–$1,200 | $800–$1,900 | Half day |
| Line-Voltage Install (Electrician + Conduit) | $800–$1,500 | Post, conduit, fixture, permit: $600–$2,000 | $1,400–$3,500 | 1–2 days |
| Full Trench & Conduit Run (50+ ft) | $1,200–$2,500 | Conduit, wire, burial: $800–$2,500 | $2,000–$5,000+ | 2–3 days |
What’s Included in Labour Costs
- Base assessment: Check existing concrete or soil conditions; determine if the old base can be reused.
- Post assembly & mounting: Install bolts, brackets, and the fixture itself; ensure plumb and level.
- Electrical connection: Safe wire termination, weatherproof junction boxes, and testing (low-voltage systems).
- Wiring (low-voltage only): Trenching, cable burial, and transformer setup included in labour.
- Cleanup: Debris removal and site restoration.
Material Costs Breakdown
Lamp post (post + base): $200–$800 depending on style (traditional wrought iron, modern aluminum, decorative stone). Standard residential posts run $250–$500. Specialty finishes cost more.
Light fixture (bulb + housing): $100–$600. LED fixtures last 25,000+ hours and draw minimal power, so they pay for themselves. Incandescent or halogen bulbs are cheaper upfront but cost more to run and replace.
Electrical components (low-voltage): Transformer ($150–$300), low-voltage cable ($1–$2/ft), connectors ($20–$50).
Electrical components (line-voltage): Conduit ($1–$3/ft), 14/2 or 12/2 wire ($0.50–$1.50/ft), disconnects and junction boxes ($80–$150), permit ($50–$200).
Concrete base (if needed): $150–$400 for a new 2-foot hole, concrete, and anchors. If your existing base is solid and level, you skip this cost entirely—one reason why RenoHeal’s labour-only option saves hundreds for Scarborough and Brampton homeowners with reusable bases.
Regional Price Variation in the GTA
Toronto and North York tend to run 10–15% higher due to traffic, parking constraints, and higher service call minimums. Vaughan, Markham, and Thornhill typically cost 5–10% less. Rural areas like Newmarket and Aurora may have travel fees ($50–$100) if the contractor travels more than 30 km from their base.
Ready to install? Get a free estimate from RenoHeal—we’ll assess your base, recommend the right wiring method, and quote exact labour and materials for your location.
DIY vs Hiring a Professional for Lamp Post Installation
Lamp post installation looks straightforward—assemble, bolt it down, wire it up—but there are real risks when you skip a professional. The biggest issue is electrical safety. If your lamp post connects to existing outdoor wiring or a new circuit, improper grounding or loose connections can cause shocks or fires. Ontario’s electrical code requires licensed work for permanent outdoor fixtures, and your homeowner’s insurance won’t cover damage from unpermitted DIY electrical work.
Structural failure is another real concern. A lamp post secured improperly or set at the wrong depth will lean or topple over time, especially through Toronto and GTA winters with freeze-thaw cycles. You’ll need to dig below the frost line (typically 4 feet in Ontario), set a proper concrete base, and ensure the post is plumb and secure.
DIY is viable if you’re replacing a lamp post on an existing, reusable base and the wiring is already in place—essentially a swap-out job. For new installations, electrical work, or foundation prep, hiring a professional handyman protects your home and wallet. A pro handles permits, codes, grounding, and weatherproofing in one visit. We’ve completed 3,500+ projects across Toronto and the GTA with full insurance and WSIB coverage.
Common Mistakes Homeowners Make During Lamp Post Installation
Skipping Permits and Electrical Inspection
Many homeowners assume lamp posts don’t need permits because they’re “just outdoor lighting.” Toronto and most GTA municipalities require electrical permits for permanent outdoor fixtures wired to your home’s power. Skipping this leaves you liable for code violations and voids insurance claims if something goes wrong. Hire a pro who pulls the permit, completes the work to code, and schedules inspection.
Setting the Base Too Shallow
Ontario’s frost line sits around 4 feet deep. If your lamp post base is poured shallower, frost heave in winter will push it up, creating gaps, misalignment, and eventually a wobbly or tilted post. This is one of the most common issues we see in North York and Scarborough, where the ground freezes hard. A professional digs deep, sets a stable concrete footing, and ensures proper drainage to prevent water pooling around the base.
Loose Bolts and Poor Weatherproofing
Outdoor bolts corrode and loosen over time if not sealed and tightened properly. Exposed threads, cracks in caulking, and gaps around the base allow water into electrical connections. Use stainless steel bolts, apply caulking around all joints, and check bolts twice yearly. A professional weatherproofs the entire assembly so water never reaches wiring or structural fasteners.
Improper Grounding and Electrical Connections
The lamp post frame must be grounded to your home’s electrical system. If you don’t ground it correctly or use the wrong gauge wire, you risk shock hazard in wet conditions. Loose wire connections inside the post corrode and fail. A licensed electrician verifies grounding, uses the correct wire size per code, and seals all connections with approved fittings and conduit.
How to Choose the Right Lamp Post for a Toronto Front Yard
The lamp post you pick sets the tone for your home’s curb appeal, and in the GTA, durability matters. Ontario winters mean freeze-thaw cycles that crack cheaper materials and corrode hardware, so invest in quality upfront.
Material Choices for Canadian Climate
Aluminum: Lightweight, rust-resistant, and affordable ($150–$400). Most popular in Toronto and Scarborough because it handles salt spray and moisture without deteriorating. Won’t rot like wood and requires minimal maintenance.
Vinyl: Very low maintenance, can’t corrode, and comes in multiple finishes. More expensive ($300–$600) but lasts 20+ years. Good for busy homeowners in North York and Vaughan who don’t want annual touch-ups.
Steel (powder-coated): Looks premium, very durable, but needs proper coating to prevent rust. Best for classic, high-end aesthetics. Costs $250–$500 depending on finish.
Height and Style
Standard lamp posts are 4–6 feet tall for residential driveways and walkways. Taller posts (7–8 feet) work for longer properties or commercial entrances. Choose a style that matches your home’s architecture: modern minimalist, traditional Victorian, rustic farmhouse, or contemporary.
Ready to find the right post? Get a free estimate and let our team assess your space.
Frequently Asked Questions
Do I need a permit to install an outdoor lamp post in Toronto?
In most cases, yes. Any new electrical work in Toronto — including running a circuit to an outdoor lamp post — requires an electrical permit and must be inspected by the Electrical Safety Authority (ESA). If you’re simply replacing an existing post on an already-permitted circuit, a permit may not be required, but it’s worth confirming with the ESA or a licensed electrician before starting work.
Can a handyman do lamp post wiring or does it require an electrician?
In Ontario, any work involving the electrical panel, running new wiring, or connecting to a circuit must be done by a licensed electrician — that’s the law under the Ontario Electrical Safety Code. A skilled handyman can handle the physical installation: setting the post, pouring the base, and securing the fixture. For a complete job, RenoHeal coordinates both trades so you don’t have to manage multiple contractors.
How much does outdoor lamp post installation cost in Toronto?
A straightforward lamp post installation on an existing base typically runs $200–$450 CAD in labour, depending on post height and fixture complexity. If a new concrete base is needed, add $150–$300. Full electrical work — trenching, running conduit, and connecting to the panel — can add another $400–$900 depending on the distance from the house and panel capacity. Always get a written quote that separates materials from labour.
How do I know if my existing lamp post base is still usable?
Check for visible cracking, heaving, or tilting — Toronto’s freeze-thaw cycles are hard on concrete, and a base that has shifted even slightly can compromise a new post’s plumb and stability. Dig around the perimeter to confirm the base extends at least 36–48 inches below grade (below the frost line). If the existing conduit or wiring inside the base is corroded, brittle, or undersized, it should be replaced before the new post goes in.
What type of lamp post holds up best in Toronto winters?
Aluminum and powder-coated steel posts are the top choices for Toronto’s climate — they resist rust, don’t crack in the cold, and hold their finish under heavy snow and ice loads. Avoid plain cast iron unless it’s been properly coated and sealed, and skip resin or hollow plastic posts entirely, as they become brittle below -20°C. For the fixture itself, look for a wet-location rating (UL listed) and a sealed gasket where the globe meets the housing to keep out moisture.
How long does it take to install a lamp post on an existing base?
On a solid, level existing base with conduit already in place, a professional can complete the physical installation — assembling the post, threading the wire, securing the fixture, and restoring landscaping — in two to four hours. If the wiring connection is being handled the same day, factor in an additional one to two hours for the electrician’s portion. A full new installation with a fresh concrete base takes longer due to cure time, typically requiring a return visit 24–48 hours after the pour.
Outdoor Lamp Post Installation in Toronto: Get It Done Right the First Time
A lamp post adds real curb appeal and practical safety lighting — but only if the base is solid, the post is rated for Canadian winters, and the wiring meets Ontario electrical code. Cutting corners on any one of those three things means redoing the work within a season or two.
The biggest mistakes homeowners run into are skipping the ESA permit, underestimating frost-line depth for the concrete base, and choosing a fixture that isn’t rated for wet outdoor use. Getting those details right upfront saves money and headaches down the road.
RenoHeal has completed 3,500+ projects across Toronto and the GTA, carries $5M in liability insurance and full WSIB coverage, and coordinates both the physical installation and licensed electrical work so the job is done properly from start to finish. Request a free quote today, or learn more about our full range of general home repair and outdoor services.