
If you’re searching for shower caulking Toronto cost, you’re probably wondering whether to tackle it yourself or call a professional. The truth is, a quality caulking job costs more than the silicone alone—it includes prep work, mold treatment, and materials that actually last. In Toronto’s humid climate, cheap caulk fails fast, leading to water damage and mold behind your walls. This guide breaks down what a real professional service includes and what you’ll actually pay.
We recently completed a full shower caulking project at a residential building in Toronto that shows exactly what goes into the work. It wasn’t just squeezing silicone into a gap—it involved removing safety rails, treating existing mold, deep cleaning joints, and applying premium waterproof silicone. That’s the difference between a Band-Aid fix and a job that protects your bathroom for years.
What Professional Shower Caulking Actually Involves
Professional shower caulking isn’t a 30-minute job. It starts with removing old, deteriorated caulk using specialized tools—scraping out every bit of hardened silicone and sealant that’s collected dirt, mold, and soap residue over years. This step alone takes time and care to avoid damaging tile or the substrate underneath.
Once old caulk is gone, the joints get a deep clean. A pro will use a mold-fighting solution to kill any spores lurking in the grooves, then dry everything thoroughly. This prevents mold from returning under your new silicone. Moisture is your shower’s enemy in Toronto’s climate—the cleaning phase stops it before it starts.
The next phase is surface preparation. Any loose grout or debris gets removed, and the joints are primed if needed (depending on the substrate). The area around the caulk line gets taped to ensure clean edges and prevent silicone from spreading onto tile or walls where it doesn’t belong.
Application comes next. A professional uses premium, mold-resistant waterproof silicone—not painter’s caulk, which cracks and fails in wet areas. The silicone gets applied in a smooth, even bead, tooled to sit properly in the joint so water runs into the drain, not behind the tile. Quality matters here: brands rated for wet areas in cold climates hold up through Toronto winters and high-humidity summers.
Finally, curing time is observed. Most silicone needs 24–48 hours before the shower runs again. A professional won’t rush this or promise same-day use—that’s how jobs fail.
A Real Toronto Job: What RenoHeal Did at The West Mall
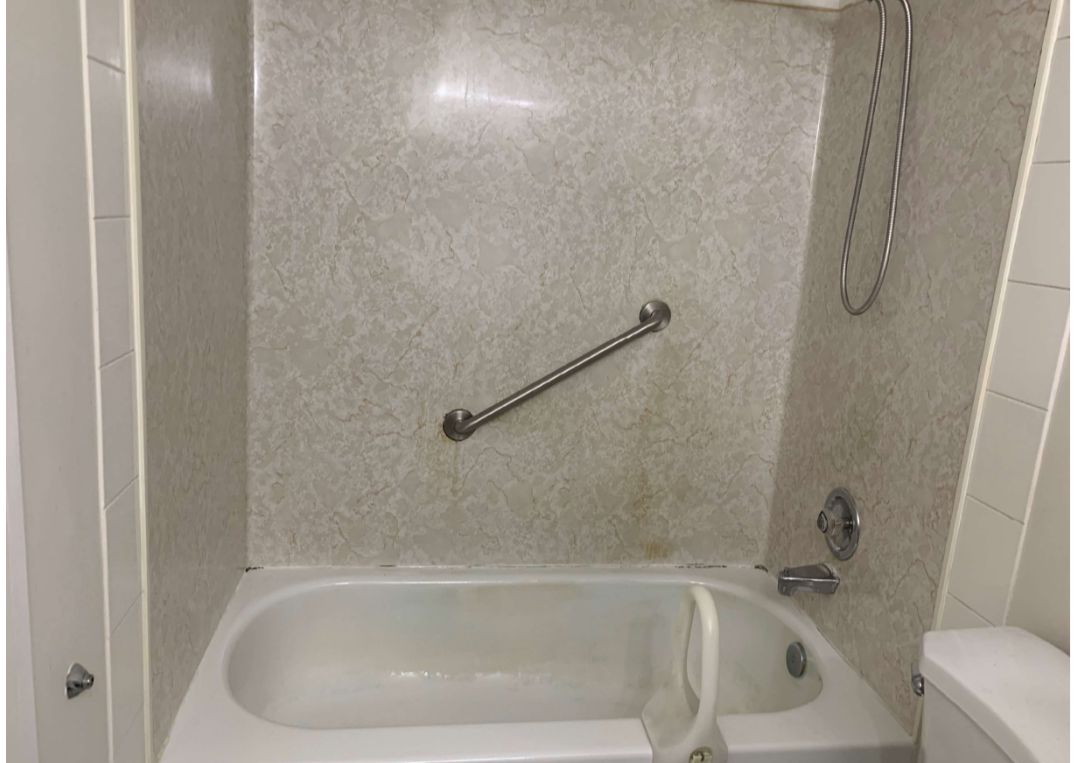
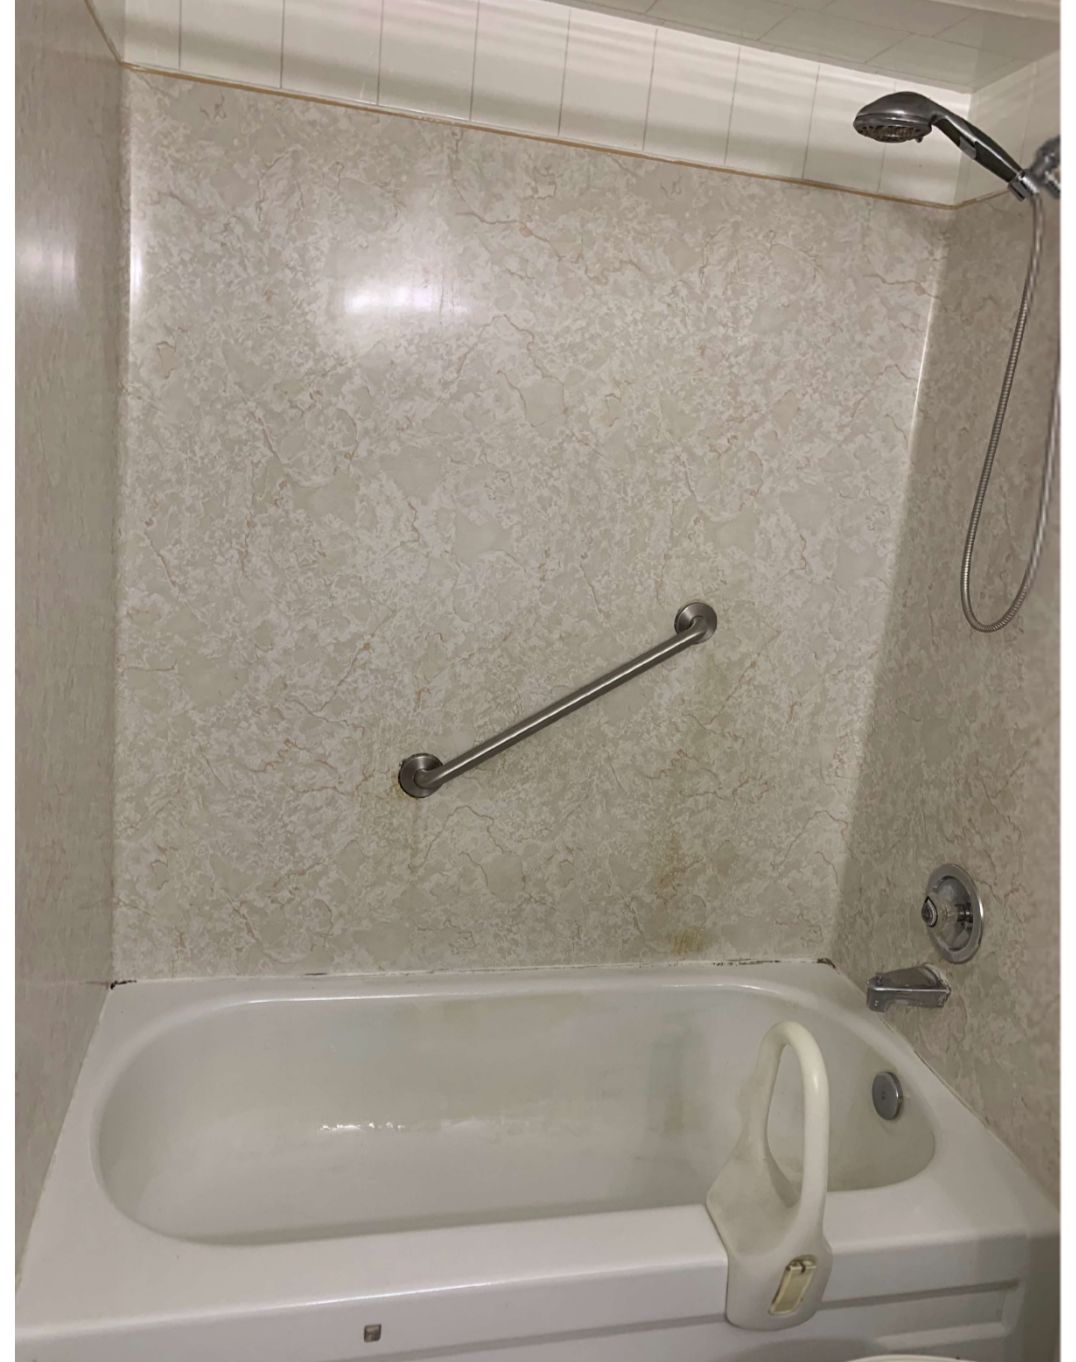
We completed a full shower caulking and sealing project at a residential building near The West Mall in Toronto that shows what a complete service looks like. The client had an older shower with safety rails, deteriorated caulk, visible mold in the joints, and water staining on the walls—a common situation in Toronto apartments and condos where humidity stays high year-round.
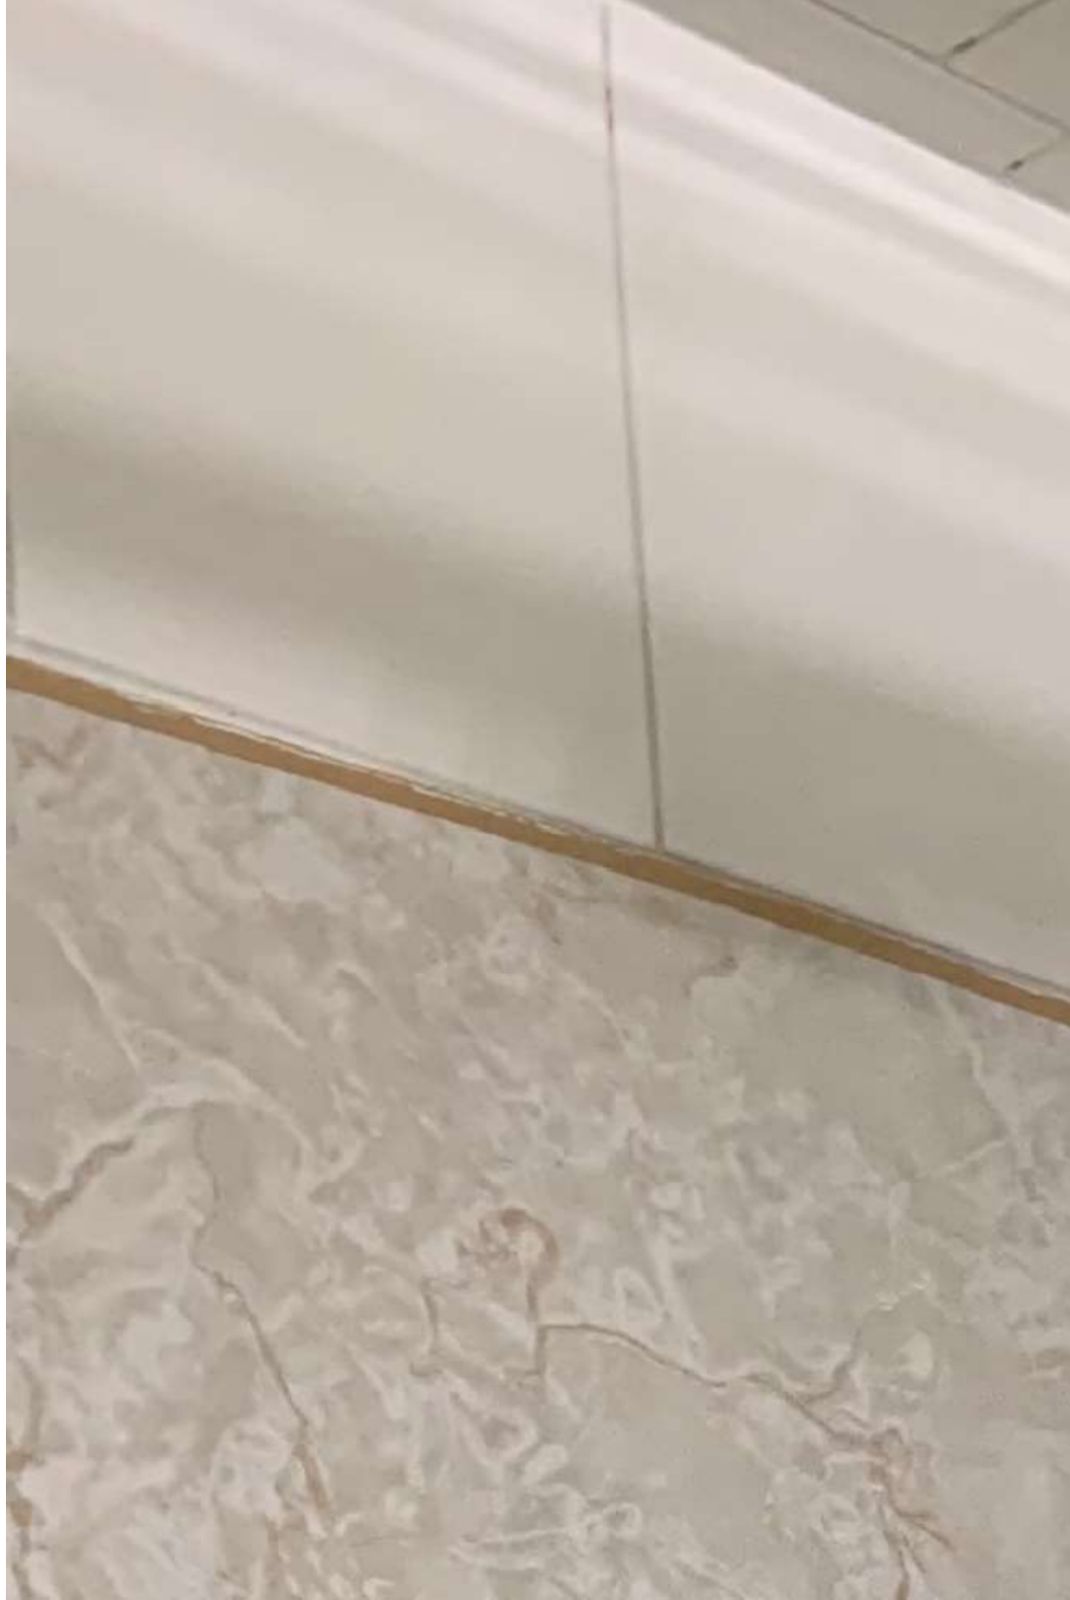
The job started with safely removing the existing safety rails so we could access the full length of the caulk lines. This step is often overlooked by DIYers but essential for a thorough job. We then removed all old, failing caulk using scrapers and specialized tools, exposing the joints underneath. As expected, there was mold growth—black spots and discoloration in the grout lines from years of moisture and poor ventilation.
We applied a professional mold treatment to kill spores and prevent regrowth, then deep cleaned every joint with a brush and cloth to remove residual mold, soap scum, and mineral deposits. Once the area was completely dry, we applied premium mold-resistant waterproof silicone, tooling each bead to ensure proper water drainage. The rails were reinstalled, and we allowed the full 48-hour cure before the client used the shower again.
The result: a watertight seal that stops water intrusion, a mold-free environment, and a clean, professional appearance. This is what you’re paying for when you call a pro—not just caulk, but a complete protective system for your bathroom.
Shower Caulking Toronto Cost: What to Expect in 2026
Professional shower caulking in Toronto typically runs between $300 and $1,200 CAD, depending on the scope of work and bathroom size. A standard tub surround or single shower enclosure usually costs $400–$700, while larger projects with multiple joints, mold treatment, and waterproofing can exceed $1,000.
| Project Type | Typical Cost Range (CAD) | Time to Complete |
|---|---|---|
| Tub surround caulking only | $300–$500 | 2–3 hours |
| Shower enclosure + mold treatment | $500–$800 | 3–5 hours |
| Full bathroom caulking + waterproofing | $800–$1,200 | 5–8 hours |
What Affects the Final Price?
- Old caulk removal: If existing caulk is heavily molded or calcified, removal takes longer and costs more.
- Mold treatment: Professional mold remediation and deep cleaning add $100–$300 depending on severity.
- Tile condition: Cracked grout or damaged tile joints require prep work before new caulking.
- Material choice: Premium mold-resistant silicone costs more than standard latex but lasts longer in Toronto’s humid climate.
- Bathroom size and complexity: Multiple corners, nooks, and curved surfaces increase labour time.
In Toronto, North York, and Scarborough, most homeowners pay closer to the $500–$800 range for a complete, professional job that includes old caulk removal and mold treatment. Get a free estimate from RenoHeal to see the exact cost for your shower.
What Type of Caulk Should Be Used in a Shower?
Not all caulk is created equal—shower environments demand moisture-resistant, flexible materials that won’t shrink, crack, or harbor mold. In Ontario’s humid climate, choosing the right caulk type is the difference between a one-year job and a five-year repair.
Silicone (Best Choice for Showers)
100% silicone is the professional standard for shower caulking. It’s fully waterproof, remains flexible after curing, and resists mold and mildew far better than alternatives. High-quality mold-resistant silicone (like those with antimicrobial additives) is ideal for Toronto bathrooms where humidity stays high year-round.
Latex and Acrylic Caulk (Not Recommended)
Latex and acrylic caulk are water-soluble and break down inside shower enclosures. They shrink as they dry, crack under moisture stress, and become a breeding ground for mold. While cheaper upfront ($15–$25 per tube), they typically fail within 1–2 years.
Sanded vs. Unsanded Silicone
Sanded silicone contains fine grit and is meant for wider grout lines (over ⅛ inch). Unsanded silicone works best for tight caulking joints in showers. Most shower work uses unsanded, mold-resistant silicone for a smooth, waterproof seal.
Professional installation includes removing all old, moldy caulk and joints, treating for existing mold, and applying premium waterproof silicone in one clean bead. This is what separates a DIY patch from a durable professional bathroom service in Toronto.
DIY vs Hiring a Professional for Shower Caulking
Shower caulking looks straightforward—buy a caulk gun, squeeze in some silicone, smooth it out. In reality, most DIY attempts fail within 6–18 months because the work is harder than it appears and the stakes are high. Water that gets behind failed caulk causes mold, rot, and structural damage that costs thousands to repair.
The core problem: DIY caulking skips the critical prep work. You need to remove every trace of old caulk (takes 2–4 hours with the right tools), treat any mold underneath, dry the joint completely, and apply caulk in the right temperature and humidity conditions. Most homeowners skip these steps or do them halfway, which guarantees failure.
Professional shower caulking in Toronto costs $200–$500 depending on complexity and bathroom size, but includes proper removal, mold treatment, deep cleaning, and a warranty. That’s worth the investment because you’re protecting your home’s structure and avoiding costlier water damage repairs down the road. If your shower has existing mold, visible deterioration, or multiple problem areas, a professional is non-negotiable—DIY patches won’t hold. Get a free estimate to see what’s involved with your specific shower.
Common Mistakes That Lead to Early Caulk Failure
Skipping mold treatment. If old caulk harbored mold, new caulk applied over it will fail again within months. The mold eats through the silicone bond and creates gaps where water seeps in. Professional removal includes identifying and treating mold with appropriate antifungal solutions before new caulk goes in.
Not removing old caulk completely. Many DIYers think a fresh layer of caulk over the old stuff is acceptable. It isn’t. Old caulk shrinks, cracks, and loses adhesion. New caulk can’t bond properly to a compromised surface. Complete removal—down to clean, dry tile and grout—is non-negotiable for any caulk job that lasts.
Using the wrong caulk product. Acrylic latex caulk is cheaper but breaks down in wet environments. Shower caulking requires 100% silicone or polyurethane designed for kitchen and bath use. GE and DAP make solid options, but premium mold-resistant silicones (with fungicide built in) perform best in humid bathrooms across Toronto, Mississauga, and the GTA where moisture is relentless.
Poor surface preparation and humidity. Applying caulk to wet, dirty, or oily surfaces causes it to fail immediately. The joint must be clean, dry, and free of dust. Humidity above 85% or temperatures below 10°C also prevent proper curing. Many DIY failures happen because work was rushed in winter or right after a shower.
Our bathroom services handle these details so the job lasts. We remove old caulk properly, treat mold, use premium waterproof silicone, and ensure ideal curing conditions—that’s why our work comes with a warranty.
How to Know It’s Time to Recaulk Your Shower
Shower caulk doesn’t last forever. In Ontario’s humid climate, moisture breaks down even quality silicone over time. Most caulk needs replacement every 3–5 years, sometimes sooner in heavily used bathrooms.
Look for these warning signs that your shower needs recaulking:
- Visible cracks or gaps — Even hairline splits let water behind tiles and into walls
- Mold or dark staining — Black specks along the caulk line mean moisture is trapped and mold is growing
- Lifting or peeling edges — Caulk pulling away from the tile creates pockets where water pools
- Discoloration or yellowing — Age and mildew staining reduce seal effectiveness
- Water seeping behind tiles — Soft spots on drywall or plaster near the shower indicate failure
- Spongy grout nearby — Deteriorating grout often signals that caulk has already failed
If you ignore these signs, water infiltration can cause costly structural damage to walls and subfloors. Professional bathroom services catch these issues early. Get a free estimate if you’re unsure whether your shower needs attention.
Frequently Asked Questions
How much does shower caulking cost in Toronto in 2026?
Most homeowners in Toronto pay between $150 and $400 CAD for a professional shower recaulking service, depending on the size of the shower, the number of joints, and whether old caulk removal is included. A standard tub-shower combo typically falls in the $150–$250 range, while a large walk-in shower with multiple surfaces can run closer to $300–$400. RenoHeal offers free estimates so you know the exact cost before any work begins.
How long does professional shower caulking take?
A typical shower recaulking job takes two to four hours on-site. That includes removing the old caulk, cleaning and drying the joints, applying new silicone, and tooling it smooth. You’ll need to keep the shower dry for at least 24 hours after application before using it, so plan accordingly.
How long should shower caulk last before it needs replacing?
Quality silicone caulk applied professionally should last five to ten years in a regularly used shower. The lifespan depends on cleaning habits, water hardness, and ventilation — showers in poorly ventilated bathrooms tend to see mold and caulk breakdown sooner. Inspecting your caulk lines once a year helps you catch early cracking or peeling before water damage sets in.
Can I caulk over existing caulk instead of removing it?
It’s not recommended. Applying new caulk over old caulk almost always leads to poor adhesion, peeling, and a thicker bead that looks unprofessional and traps moisture underneath. The only reliable approach is to fully remove the existing caulk, clean the substrate, let it dry completely, and then apply a fresh bead — which is exactly what a professional service includes.
Is silicone or acrylic caulk better for a shower?
100% silicone caulk is the right choice for showers. It bonds strongly to tile, glass, and acrylic surfaces, stays flexible through expansion and contraction, and resists mold far better than acrylic or latex blends. Acrylic caulk is easier to work with and paintable, but it breaks down quickly in a wet environment and is not suitable for shower joints.
Does RenoHeal offer a warranty on shower caulking services?
Yes — RenoHeal provides a warranty on eligible services, including shower caulking. If you experience peeling, cracking, or adhesion failure within the warranty period under normal use conditions, the team will return to make it right. Specific warranty terms are confirmed at the time of your estimate.
Shower Caulking Toronto Cost: What You’re Really Paying For
The price of a professional shower recaulking service in Toronto isn’t just for a tube of silicone and 20 minutes of work. It covers proper old-caulk removal, surface prep, the right material for a wet environment, and a clean finished bead that actually seals — protecting your tile, walls, and subfloor from water damage that costs far more to fix later.
Cutting corners with a DIY patch or a low-cost service that skips prep steps is one of the most common reasons homeowners end up calling for mold remediation or tile repairs within a year. Doing the job properly the first time is always the better investment.
RenoHeal’s technicians handle shower recaulking across Toronto and the GTA with fully insured, warrantied service and free estimates. Request a free quote today, or visit our caulking service page to learn more about what’s included.