
Window caulking and painting Richmond Hill homes requires more than just a fresh coat of paint. The process involves three distinct steps that must happen in the right order: sanding, caulking, and repainting. Many homeowners skip or rush the caulking stage, which leads to water damage, failed paint jobs, and expensive repairs down the road. Understanding why each step matters helps you protect your investment and extend the life of your windows.
We recently completed a 10-unit window sand, caulk, and repaint project in Richmond Hill, plus exterior wood replacement and other exterior work. The project showed us exactly why this sequence works and what happens when it doesn’t. If you’re planning similar work in Thornhill, North York, or across the GTA, this guide walks you through the real costs, timeline, and proper execution.
What “Window Sand, Caulk & Repaint” Actually Involves
The three-step process starts with sanding. This removes the old, chalky paint layer that sits on the window frame and sill. Sanding isn’t cosmetic—it removes paint failure and creates a clean, smooth surface that new paint can grip. You’ll use 120–150 grit sandpaper by hand or with a small orbital sander, depending on the window’s condition. This step typically takes 15–30 minutes per window in Richmond Hill homes, depending on how badly the old paint has degraded.
Caulking comes second, and this is where most DIY efforts fail. After sanding, you inspect the window frame for gaps, cracks, or separation between the frame and the siding. These gaps let water in. Use a high-quality exterior caulk (acrylic latex or silicone-based) that matches your trim colour. Apply it smoothly into gaps, then tool it (smooth it with a wet finger or caulk tool) before it dries. This step takes 10–20 minutes per window and must cure fully (usually 24–48 hours) before painting.
Repainting is the final step. Once the caulk has cured, you apply primer (if bare wood is exposed) and then two coats of exterior paint. Exterior paint in the GTA must handle freeze-thaw cycles, UV exposure, and humidity swings. Quality acrylic latex or urethane-based paints perform best. Each window typically takes 1–2 hours between coats and cure time.
Why Skipping Caulking Before Painting Is a Costly Mistake
Painting over gaps and cracks without caulking first is a false economy. Water will find those gaps immediately—especially in Ontario’s climate, where freeze-thaw cycles and heavy spring rains are relentless. Water gets behind the paint, under the caulk seam, and into the wood frame itself. Within one to two seasons, the paint bubbles and peels. You’ve wasted money and time on a paint job that failed.
Natural Resources Canada estimates that air leakage accounts for a large share of home heat loss, and its home energy efficiency guidance lists sealing around windows as one of the cheapest fixes. That is why every window caulking and painting Richmond Hill job we quote starts with the seal, not the paint.
Caulking also blocks drafts. A single 1/4-inch gap around a window frame can let cold air pour through in winter. That means higher heating bills and uncomfortable rooms. Painting without caulking leaves those gaps wide open. In a Richmond Hill or Vaughan home, unsealed windows can increase heating costs by 5–10% during winter months.
Wood rot happens fast when water penetrates. Once moisture gets into the window frame, it begins to break down the wood’s structure. Rot spreads, and soon you’re looking at frame replacement ($500–$1,500 per window) instead of a simple caulk-and-paint job ($150–$300 per window). The 2-unit exterior window rotten wood replacement we did in Richmond Hill on the same project would likely have been prevented with proper caulking on adjacent windows.
Paint also fails faster on unprepared surfaces. Paint needs something to stick to. Caulk creates a sealed, uniform surface. Without it, paint stretches across gaps, gets pulled by expansion and contraction, and eventually cracks. The sequence—sand, caulk, cure, then paint—ensures every layer bonds properly and lasts 5–7 years in the GTA climate.
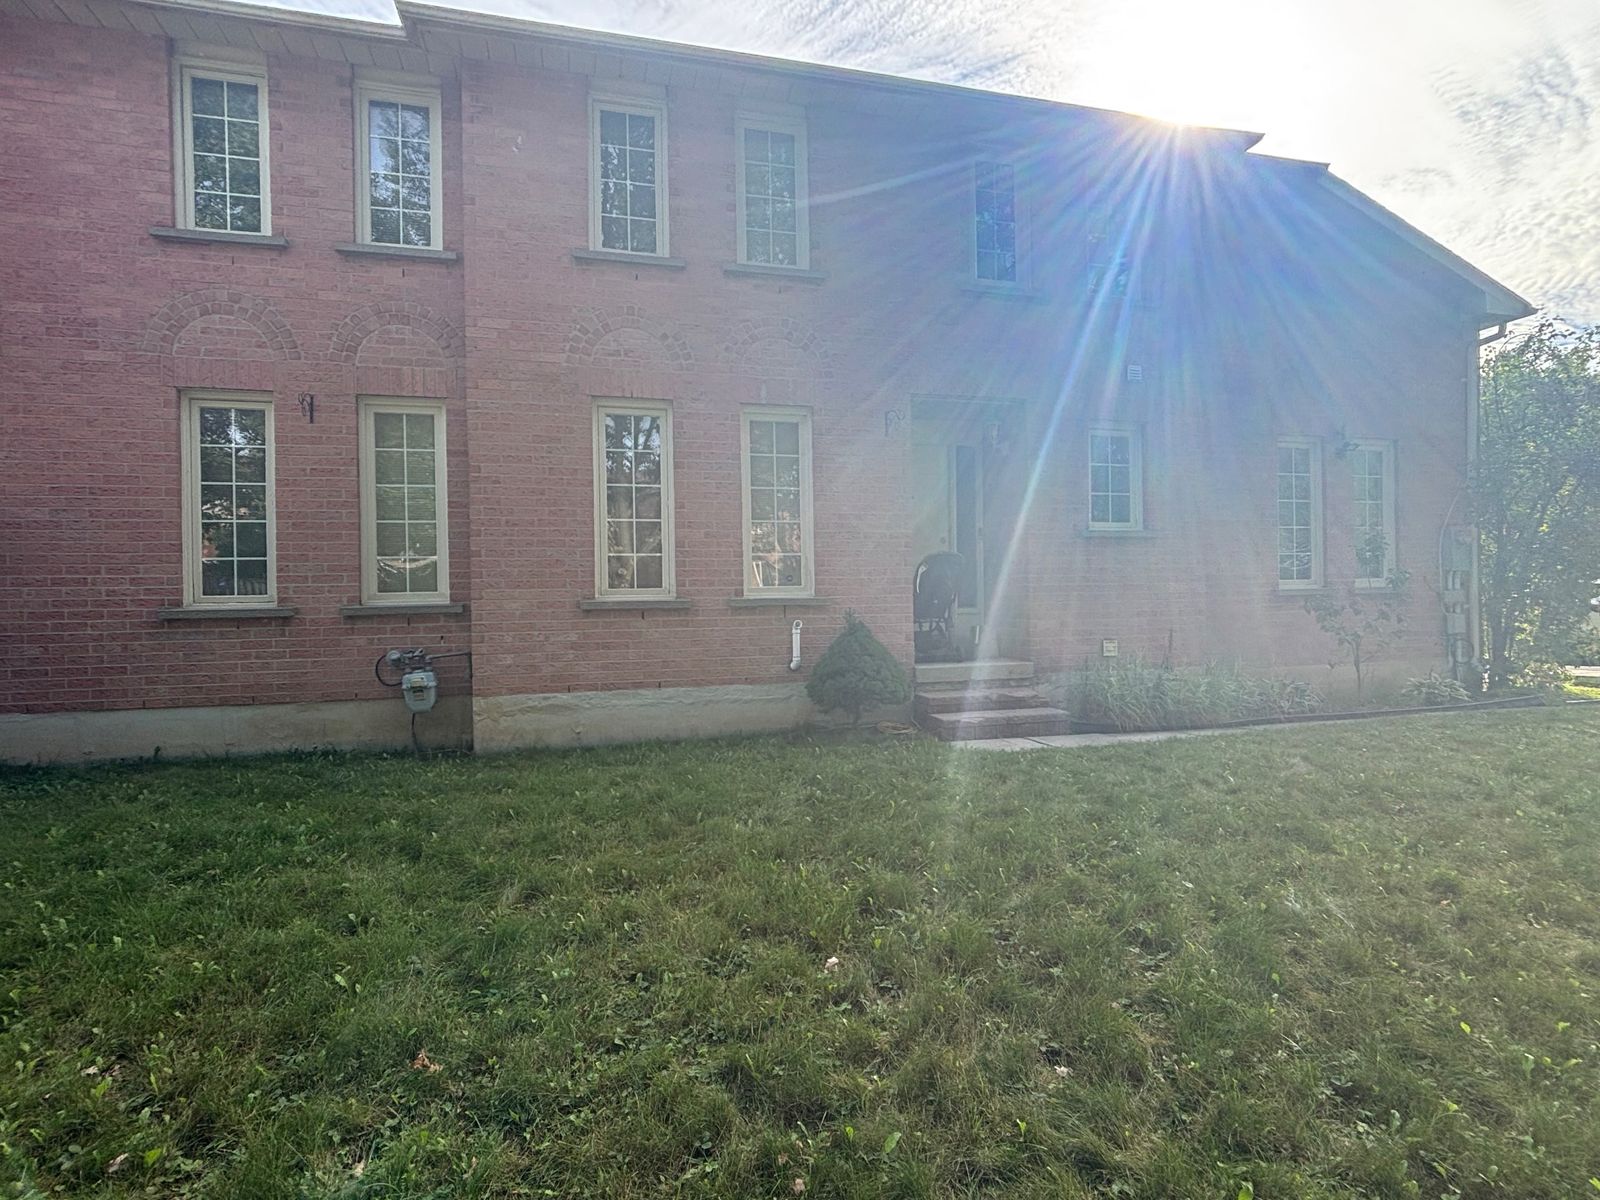
Window Caulking and Painting Richmond Hill: What We Did on This Job
This Richmond Hill homeowner had 10 exterior windows that needed full restoration: sanding, caulking, and repainting. The windows had old, deteriorated caulk that was letting moisture in, and the paint was peeling and cracked in several spots. We also found rotten wood on 2 window frames—a common issue in Ontario homes after winter cycles of freeze-thaw and moisture.
Here’s what we tackled:
- All 10 windows: Sanded down to bare wood, applied fresh caulk, and repainted with high-quality exterior paint.
- 2 windows with rotten wood: Replaced damaged sill sections and trim before caulking and painting.
- Bonus work: While we were there, the homeowner also had us repair a backyard fence post, update the powder room sink drain, repaint an exterior door and frame, and adjust a fence lock.
The whole project took 3 days. By the end, the windows looked like new—no more gaps, no drafts, and a fresh coat of paint that’ll last 5–7 years in the Richmond Hill climate. The wood repairs mean those frames are protected from further water damage, which saves thousands down the road.
Window Caulking and Painting Richmond Hill Cost Guide (2026)
Pricing for window caulking and painting in Richmond Hill depends on how many units you’re doing and whether wood repair is needed. Here’s what you can expect in 2026:
| Service | Unit Count | Estimated Cost (CAD) | Notes |
|---|---|---|---|
| Window Sand, Caulk & Repaint | 1–3 windows | $180–$280 per window | Includes sanding, caulk, exterior paint (1 coat). Standard double-hung. |
| Window Sand, Caulk & Repaint | 4–8 windows | $140–$200 per window | Volume discount. Better labour efficiency on multi-unit jobs. |
| Window Sand, Caulk & Repaint | 9+ windows | $110–$160 per window | Full-house jobs (like the Richmond Hill project). Economies of scale. |
| Exterior Wood Repair (per window) | 1 unit | $150–$400 | Depends on rot severity. Small sill repair vs. frame replacement. |
| Caulk Only (no paint) | Per window | $60–$100 | Maintenance refresh between paint jobs. |
Pro tip: Doing all your windows at once (like the Richmond Hill homeowner did with 10 units) saves money per unit and ensures consistent colour and finish. If wood rot is present, fixing it during the same visit prevents compounding damage.
For a free estimate on your Richmond Hill windows, RenoHeal provides detailed quotes that account for your home’s specific condition. We’re fully insured ($5M) and cover all painting and caulking work with a warranty on eligible services.
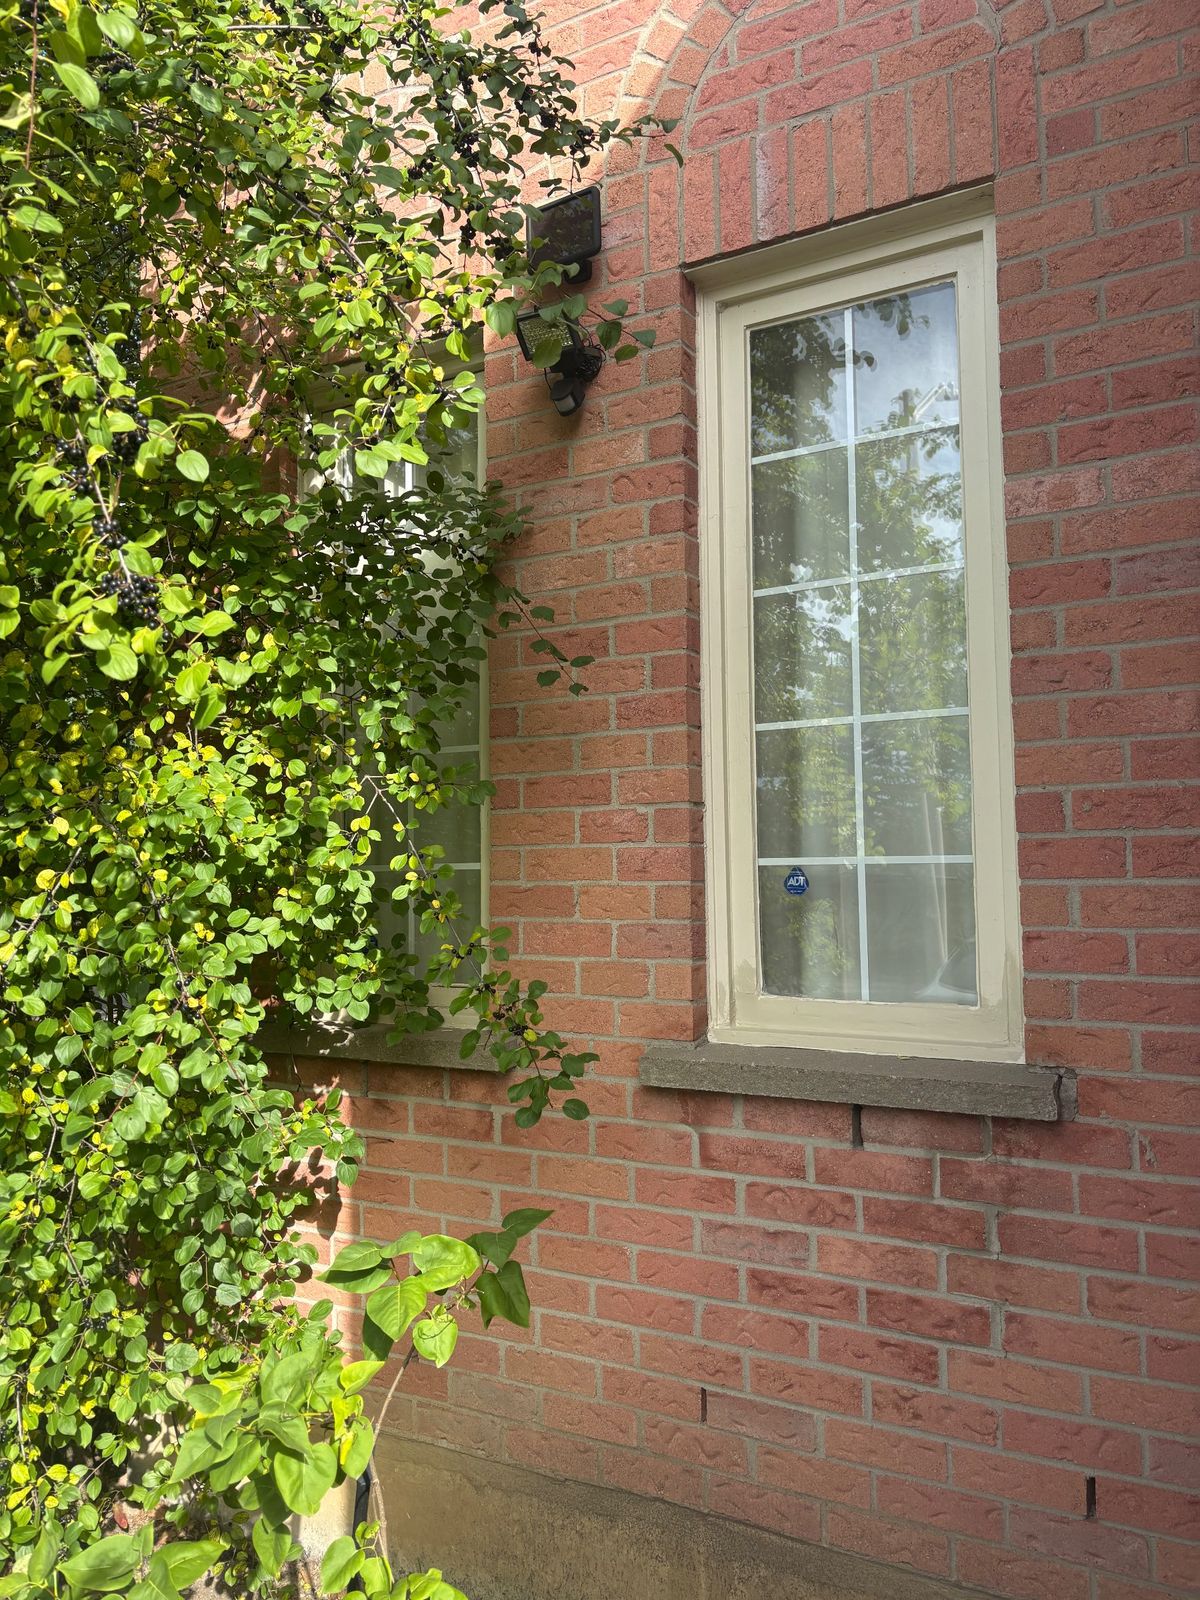
Signs Your Windows Need Caulking, Sanding, or Repainting Now
Richmond Hill’s freeze-thaw cycles and moisture-heavy springs create ideal conditions for window deterioration. If you spot cracked or peeling caulk around your frames—especially at the corners—water is likely seeping in behind the paint. This is the earliest warning sign and the cheapest to fix.
Peeling or bubbling exterior paint is your second red flag. This happens when moisture gets trapped under the finish, pushing the paint away from the wood. Run your fingernail along the frame; if paint flakes off easily, the window needs sanding and repainting soon.
Soft or spongy wood at the sill or muntins (the strips between panes) means rot has started. This is serious. If the damage is shallow, you can sand it back and repaint. If rot runs deep—more than 1/4 inch into the wood—you’ll need to replace that section or the entire sash. One recent Richmond Hill project we completed involved replacing rotten exterior wood on 2 window units while sanding and repainting 10 others, showing how mixed the damage can be across a home.
Also check for:
- Visible gaps between the window frame and the exterior trim (caulk has failed)
- Water stains on interior sills or drywall
- Caulk that’s hard, cracked, or pulling away from the wood
- Paint that’s chalky to the touch (UV degradation)
DIY vs. Hiring a Professional for Window Caulking and Repainting
DIY: Realistic skill and tool requirements. Sanding, caulking, and painting windows looks straightforward until you’re 20 feet up on a ladder holding a brush. You’ll need a orbital sander ($50–150 to rent), caulk gun, exterior caulk (typically acrylic-latex), primer, quality exterior paint, putty knife, sandpaper (80, 120, and 220 grit), and a steady hand. Most homeowners underestimate prep time—sanding ten windows properly takes 8–12 hours alone, not including primer and paint coats.
We handle the caulking through our Richmond Hill caulking service and the finish coats through our exterior painting and trim painting crews, so one team owns the whole job. See our Richmond Hill page for areas we cover.
The real risks: uneven paint coverage, caulk that fails within 2–3 years because it wasn’t applied to clean, dry wood, and accidentally damaging glazing compound on older windows. You also won’t have a warranty if something goes wrong or the paint peels prematurely.
Professional approach: Why it matters. A professional painter arrives with industrial-grade sanders, extension tools that reach high windows safely, and the experience to spot hidden rot before you spend money on cosmetic work. They know Ontario’s building codes for exterior paint systems and use primers and paints rated for our climate. In Richmond Hill, one project involved sanding and repainting 10 window units plus replacing rotten wood on 2 others—work that requires spotting damage early and adjusting the scope mid-project. Professionals have the insurance ($5M coverage is standard) and warranty on their work, which protects you if the paint fails or caulk separates within a specified period.
Cost difference: DIY materials run $400–800 for a typical home; professional window caulking and repainting ranges from $2,500–5,500 CAD depending on the number of units, condition, and whether wood replacement is needed. That premium buys you safety, durability, and recourse if something fails.
Hybrid approach: You can paint interior trim yourself and hire a pro for exterior windows. If your windows are in decent shape (caulk is intact, paint is mostly sound), a thorough cleaning and fresh paint may be all you need. Get a free estimate to have the damage assessed before deciding.
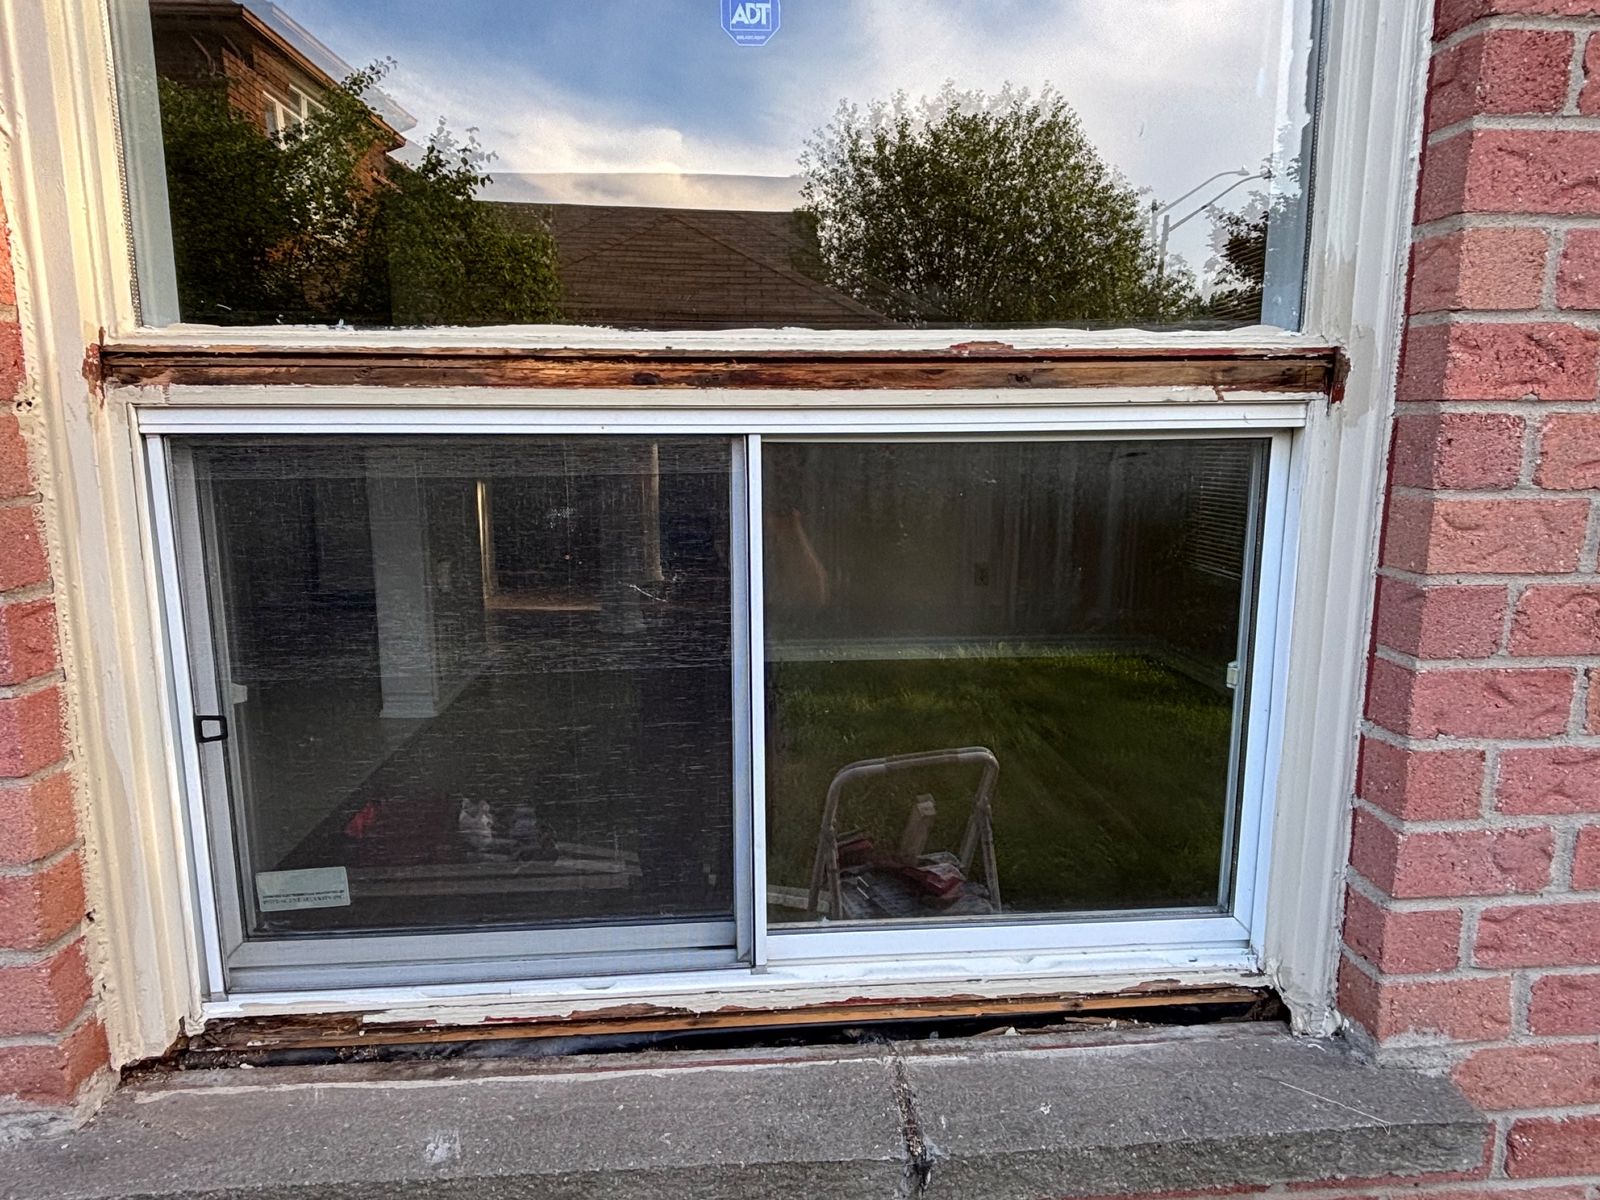
Common Mistakes Homeowners Make When Caulking and Painting Windows
The most costly error we see in Richmond Hill and across the GTA is choosing the wrong caulk type. Many homeowners grab a cheap acrylic caulk from the hardware store, only to watch it fail within two years. Acrylic shrinks, cracks, and lets water penetrate—exactly what you’re trying to prevent. For exterior windows, you need a flexible, paintable polyurethane or silicone-based caulk that moves with seasonal wood expansion and actually lasts.
Painting over rotten wood is another common mistake that turns a $500 fix into a $2,000+ problem. If the wood around your window frame is soft, discolored, or spongy, paint just hides the damage. Water continues rotting the wood underneath, and by the time you notice, structural damage has spread. That’s why our Richmond Hill projects always include a thorough inspection—we spot rot early and replace damaged sections before priming and painting.
Skipping primer is tempting but dangerous. Many homeowners think one coat of premium paint is enough. Primer seals the wood, provides better adhesion for topcoat paint, and ensures even color coverage. Without it, paint peels faster and you’ll need repainting sooner. A proper paint job includes primer, two topcoats, and quality materials—that’s what delivers lasting results and protects your investment.
Frequently Asked Questions
How long does exterior window caulk last in Ontario’s climate?
Good-quality exterior caulk typically lasts 5 to 10 years in Ontario, but Richmond Hill’s freeze-thaw cycles can shorten that lifespan closer to 5 to 7 years. UV exposure and wood movement in summer heat add additional stress. Plan on inspecting your caulk every spring and replacing it when you see cracking, shrinking, or gaps pulling away from the frame.
Can I paint over old caulk without removing it first?
You can paint over old caulk if it’s fully adhered, flexible, and free of cracks — but that’s rarely the case when caulk actually needs attention. Painting over failing caulk just traps the problem underneath and the paint will crack along the same lines within a season. The right approach is to strip the old caulk completely, apply fresh siliconized latex caulk, let it cure, and then paint.
What type of caulk is best for exterior windows in Richmond Hill?
Siliconized latex caulk (also called paintable silicone or silicone-latex hybrid) is the best choice for exterior window frames in Richmond Hill. It bonds tightly to wood, vinyl, and brick, stays flexible through freeze-thaw cycles, and accepts exterior paint — unlike pure silicone, which paint won’t stick to. Look for a product rated for at least -40°C flexibility to handle Ontario winters.
How much does it cost to caulk and repaint 10 windows in the GTA?
For a typical two-storey home in Richmond Hill or the broader GTA, expect to pay roughly $800 to $1,800 CAD to caulk and repaint 10 windows, depending on window size, frame condition, and whether any prep work like sanding or priming is needed. Homes with deteriorating wood or multiple paint layers will be on the higher end. Getting a free on-site estimate is the most accurate way to price your specific project.
How do I know if my window frame wood is rotten and needs replacing?
Press a screwdriver or a key firmly into the wood around the frame — if it sinks in easily or the wood crumbles, that’s active rot and it needs to be repaired or replaced before any caulking or painting happens. Soft spots, discolouration, paint that keeps bubbling in the same spot, and a musty smell near the window are all warning signs. Painting or caulking over rotten wood won’t fix the problem; it just delays a bigger repair bill.
How long after caulking can I paint exterior windows?
With siliconized latex caulk, you can usually paint after 30 to 60 minutes of skin-over time, but full cure takes 24 hours — and in cooler Ontario spring or fall temperatures (below 10°C), curing slows significantly. Always check the manufacturer’s recommended recoat window on the specific product you’re using. Painting too soon traps moisture and causes the paint to peel, so when in doubt, wait a full day before applying exterior paint.
Window Caulking and Painting in Richmond Hill: Get It Done Right the First Time
Skipping either step — caulking or painting — leaves your windows vulnerable to water intrusion, air leaks, and accelerated wood decay. Done together with the right materials and proper prep, the two treatments protect each other: fresh caulk keeps moisture out, and a solid coat of exterior paint shields the caulk from UV breakdown and temperature swings.
Richmond Hill’s climate is hard on window frames. Freeze-thaw cycles, summer humidity, and heavy rain all work against poorly sealed or unpainted surfaces. Addressing both caulking and painting on the same visit is more cost-effective than tackling them separately — and it means your windows are sealed and protected before the next season hits.
RenoHeal’s technicians handle window caulking and exterior painting across Richmond Hill and the GTA — fully insured, WSIB-covered, and backed by a 4.9-star rating across 3,500+ completed projects. Request a free quote today, or learn more about our full painting services to see how we can protect your home this season.